
Users Guide


The Remote Enablement page is displayed.
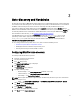
9. Under Enable Auto-Discovery, select Auto-Discovery.
NOTE: You must disable administrator account to activate Auto-discovery feature.
10. In the Provisioning Server box, enter the provisioning server IP address or host name string. The following
conditions apply while using a command to set the provisioning server IP address or hostname:
– When issuing the racadm racresetcfg or updating iDRAC7, make sure to enable the Preserve
Configuration
option while resetting the iDRAC7 to defaults. If this option is disabled, the provisioning
server IP or hostname is erased.
– Auto-discovery feature does not use the newly set provisioning server IP address or hostname for any
handshakes in progress, but is used only during the next handshake process.
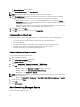
11. Click Back and then click Finish.
12. Click Yes to save the changes. Press <Esc> to exit System Setup.
Provisioning Server String Format
Auto-discovery feature supports setting multiple IP addresses and/or host names using the following format:
• The string is a list of IP addresses and/or host names and ports separated by comma.
• Host name is qualified.
• IPv4 address starts with ‘(‘ and ends with ‘)’ when specified at the same time with a hostname.
• Each IP address or hostname can be optionally followed by a ‘:’ and a port number.
• Examples of valid strings are - hostname, hostname.domain.com.
Setting Provisioning at Required Location
To set the provisioning at the required location:
1. Turn on the managed system.
2. Press <F10> Lifecycle Controller during startup.
The Lifecycle Controller page is displayed.
3. Navigate to System Setup → Advanced Configuration → iDRAC Settings .
4. Click Next to navigate to the following pages and specify various settings:
– Network Settings — Set Enable NIC to Enabled (for blade servers only).
– Common Settings — Set Auto Config Domain Name to Enabled.
– IPv4 Settings — Set Enable IPv4 to Enabled.
NOTE: Even though the infrastructure supports IPv6, it is disabled during Auto-discovery and it can be enabled
after provisioning the server.
– DHCP — Set Enable DHCP to Enabled and set Use DHCP to obtain DNS Server Addresses to Enabled.
5. On the last page, click Apply.
6. Click Finish.
7. Click Exit and Reboot.
Auto-discovering Managed System
To auto-discover the managed system:
18