
Users Guide


NOTE: If the Dell client systems are not connected to the network, you have to run the task again.
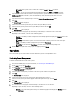
– Run At — the power management changes are queued in the Task Queue.
NOTE: You can launch the Task Queue to view the list of completed and pending tasks.
10. Provide a brief description of the task you are applying and click Finish.
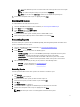
Establishing KVM Sessions
To establish KVM sessions with remote client systems:
1. Launch the Dell AMT vPro Plugin. For more information, see Launching the Dell AMT Plug-in.
2. On the Home screen, click Operations.
3. On the Operation window, click KVM Connect.
The KVM Connect tab is displayed.
4. Search for the list of client systems on which you want establish KVM sessions.
5. Select a client system on which you want to start the KVM session and click Start.
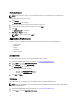
Generating Reports
This feature allows you to generate and view OOB Manageability, Provisioning, Battery Health of notebook client-
systems, and Hardware Inventory reports.
1. Launch the Dell AMT plug-in. For more information, see Launching the Dell AMT Plug-in.
2. On the Home screen, click Reports.
3. On the Welcome screen you can generate the following reports:
– OOB Manageability — you can see the AMT Management Engine configuration for client systems.
– Provisioning — view the provisioning status of all the client systems in the network.
– Battery Health — view the battery health of all the AMT enabled client systems on the network.
– Hardware Inventory — collect the inventory information of all the client systems on the network.
4. After selecting the type of report you want, you can perform one of the following actions:
– Schedule — for more information, see Scheduling Reports.
– Retrieve — for more information, see Retrieving Reports.
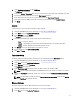
Scheduling Reports
Generate reports from all the active client systems on the network. To schedule a report:
1. Click Schedule.
The Select Clients tab is displayed.
2. Search for the list of client systems you want to view the reports on.
3. Select the client systems you want to view the reports and click Add.
4. Click Next.
5. The Schedule Report tab is displayed.
6. You can either choose to apply the Task immediately or schedule it to run at a later time.
7. Provide a brief description of the Task you are applying and click Finish.
NOTE: Schedule reports creates a task that populates data about client systems.
11