
Users Guide

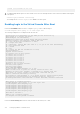
Table Of Contents
- Integrated Dell Remote Access Controller 8 (iDRAC8) Version 2.05.05.05 User's Guide
- Contents
- Overview
- Benefits of Using iDRAC With Lifecycle Controller
- Key Features
- New In This Release
- How To Use This User's Guide
- Supported Web Browsers
- Managing Licenses
- Licensable Features In iDRAC8
- Interfaces and Protocols to Access iDRAC
- iDRAC Port Information
- Other Documents You May Need
- Social Media Reference
- Contacting Dell
- Accessing support content from the Dell EMC support site
- Logging into iDRAC
- Logging into iDRAC as Local User, Active Directory User, or LDAP User
- Logging into iDRAC Using Smart Card
- Logging into iDRAC Using Single Sign-on
- Accessing iDRAC Using Remote RACADM
- Accessing iDRAC Using Local RACADM
- Accessing iDRAC Using Firmware RACADM
- Accessing iDRAC Using SMCLP
- Logging in to iDRAC Using Public Key Authentication
- Multiple iDRAC Sessions
- Changing Default Login Password
- Enabling or Disabling Default Password Warning Message
- Setting Up Managed System and Management Station
- Setting Up iDRAC IP Address
- Setting Up Management Station
- Setting Up Managed System
- Configuring Supported Web Browsers
- Updating Device Firmware
- Downloading Device Firmware
- Updating Firmware Using iDRAC Web Interface
- Updating Device Firmware Using RACADM
- Scheduling Automatic Firmware Updates
- Updating Firmware Using CMC Web Interface
- Updating Firmware Using DUP
- Updating Firmware Using Remote RACADM
- Updating Firmware Using Lifecycle Controller Remote Services
- Updating CMC Firmware From iDRAC
- Viewing and Managing Staged Updates
- Rolling Back Device Firmware
- Backing Up Server Profile
- Importing Server Profile
- Monitoring iDRAC Using Other Systems Management Tools
- Configuring iDRAC
- Viewing iDRAC Information
- Modifying Network Settings
- Configuring Services
- Using VNC Client to Manage Remote Server
- Configuring Front Panel Display
- Configuring Time Zone and NTP
- Setting First Boot Device
- Enabling or Disabling OS to iDRAC Pass-through
- Obtaining Certificates
- Configuring Multiple iDRACs Using RACADM
- Disabling Access to Modify iDRAC Configuration Settings on Host System
- Viewing iDRAC and Managed System Information
- Viewing Managed System Health and Properties
- Viewing System Inventory
- Viewing Sensor Information
- Monitoring Performance Index of CPU, Memory, and I/O Modules
- Checking the System for Fresh Air Compliance
- Viewing Historical Temperature Data
- Viewing Network Interfaces Available On Host OS
- Viewing FlexAddress Mezzanine Card Fabric Connections
- Viewing or Terminating iDRAC Sessions
- Setting Up iDRAC Communication
- Communicating With iDRAC Through Serial Connection Using DB9 Cable
- Configuring BIOS For Serial Connection
- Enabling RAC Serial Connection
- Enabling IPMI Serial Connection Basic and Terminal Modes
- Switching Between RAC Serial and Serial Console While Using DB9 Cable
- Communicating With iDRAC Using IPMI SOL
- Communicating With iDRAC Using IPMI Over LAN
- Enabling or Disabling Remote RACADM
- Disabling Local RACADM
- Enabling IPMI on Managed System
- Configuring Linux for Serial Console During Boot
- Supported SSH Cryptography Schemes
- Communicating With iDRAC Through Serial Connection Using DB9 Cable
- Configuring User Accounts and Privileges
- Configuring Local Users
- Configuring Active Directory Users
- Prerequisites for Using Active Directory Authentication for iDRAC
- Supported Active Directory Authentication Mechanisms
- Standard Schema Active Directory Overview
- Configuring Standard Schema Active Directory
- Extended Schema Active Directory Overview
- Configuring Extended Schema Active Directory
- Extending Active Directory Schema
- Installing Dell Extension to the Active Directory Users and Computers Snap-In
- Adding iDRAC Users and Privileges to Active Directory
- Configuring Active Directory With Extended Schema Using iDRAC Web Interface
- Configuring Active Directory With Extended Schema Using RACADM
- Testing Active Directory Settings
- Configuring Generic LDAP Users
- Configuring iDRAC for Single Sign-On or Smart Card Login
- Prerequisites for Active Directory Single Sign-On or Smart Card Login
- Configuring iDRAC SSO Login for Active Directory Users
- Configuring iDRAC Smart Card Login for Local Users
- Configuring iDRAC Smart Card Login for Active Directory Users
- Enabling or Disabling Smart Card Login
- Configuring iDRAC to Send Alerts
- Managing Logs
- Monitoring and Managing Power
- Inventory, Monitoring, and Configuring Network Devices
- Inventory and Monitoring Network Devices
- Inventory and Monitoring FC HBA Devices
- Dynamic Configuration of Virtual Addresses, Initiator, and Storage Target Settings
- Managing Storage Devices
- Understanding RAID Concepts
- Supported Controllers
- Supported Enclosures
- Summary of Supported Features for Storage Devices
- Inventory and Monitoring Storage Devices
- Viewing Storage Device Topology
- Managing Physical Disks
- Managing Virtual Disks
- Managing Controllers
- Configuring Controller Properties
- Importing or Auto Importing Foreign Configuration
- Clearing Foreign Configuration
- Resetting Controller Configuration
- 12Gbps SAS HBA Adapter Operations
- Monitoring Predictive Failure Analysis On Drives
- Controller Operations in Non-RAID (HBA) Mode
- Running RAID Configuration Jobs On Multiple Storage Controllers
- Managing PCIe SSDs
- Managing Enclosures or Backplanes
- Choosing Operation Mode to Apply Settings
- Viewing and Applying Pending Operations
- Storage Devices — Apply Operation Scenarios
- Blinking or Unblinking Component LEDs
- Configuring and Using Virtual Console
- Supported Screen Resolutions and Refresh Rates
- Configuring Web Browsers to Use Virtual Console
- Configuring Virtual Console
- Previewing Virtual Console
- Launching Virtual Console
- Using Virtual Console Viewer
- Managing Virtual Media
- Installing and Using VMCLI Utility
- Managing vFlash SD Card
- Configuring vFlash SD Card
- Managing vFlash Partitions
- Using SMCLP
- Using iDRAC Service Module
- Using USB Port for Server Management
- Using iDRAC Quick Sync
- Deploying Operating Systems
- Troubleshooting Managed System Using iDRAC
- Using Diagnostic Console
- Viewing Post Codes
- Viewing Boot and Crash Capture Videos
- Viewing Logs
- Viewing Last System Crash Screen
- Viewing Front Panel Status
- Hardware Trouble Indicators
- Viewing System Health
- Generating Technical Support Report
- Checking Server Status Screen for Error Messages
- Restarting iDRAC
- Erasing System and User Data
- Resetting iDRAC to Factory Default Settings
- Frequently Asked Questions
- Use Case Scenarios
- Troubleshooting An Inaccessible Managed System
- Obtaining System Information and Assess System Health
- Setting Up Alerts and Configuring Email Alerts
- Viewing and Exporting Lifecycle Log and System Event Log
- Interfaces to Update iDRAC Firmware
- Performing Graceful Shutdown
- Creating New Administrator User Account
- Launching Server's Remote Console and Mounting a USB Drive
- Installing Bare Metal OS Using Attached Virtual Media and Remote File Share
- Managing Rack Density
- Installing New Electronic License
- Applying I/O Identity Configuration Settings for Multiple Network Cards in Single Host System Reboot

initrd /boot/initrd-2.4.9-e.3.im
4. To enable multiple GRUB options to start Virtual Console sessions through the RAC serial connection, add the following line
to all options:
console=ttyS1,115200n8r console=tty1
The example shows console=ttyS1,57600 added to the first option.
Enabling Login to the Virtual Console After Boot
In the file /etc/inittab, add a new line to configure agetty on the COM2 serial port:
co:2345:respawn:/sbin/agetty -h -L 57600 ttyS1 ansi
The following example shows a sample file with the new line.
#inittab This file describes how the INIT process should set up
#the system in a certain run-level.
#Author:Miquel van Smoorenburg
#Modified for RHS Linux by Marc Ewing and Donnie Barnes
#Default runlevel. The runlevels used by RHS are:
#0 - halt (Do NOT set initdefault to this)
#1 - Single user mode
#2 - Multiuser, without NFS (The same as 3, if you do not have #networking)
#3 - Full multiuser mode
#4 - unused
#5 - X11
#6 - reboot (Do NOT set initdefault to this)
id:3:initdefault:
#System initialization.
si::sysinit:/etc/rc.d/rc.sysinit
l0:0:wait:/etc/rc.d/rc 0
l1:1:wait:/etc/rc.d/rc 1
l2:2:wait:/etc/rc.d/rc 2
l3:3:wait:/etc/rc.d/rc 3
l4:4:wait:/etc/rc.d/rc 4
l5:5:wait:/etc/rc.d/rc 5
l6:6:wait:/etc/rc.d/rc 6
#Things to run in every runlevel.
ud::once:/sbin/update
ud::once:/sbin/update
#Trap CTRL-ALT-DELETE
ca::ctrlaltdel:/sbin/shutdown -t3 -r now
#When our UPS tells us power has failed, assume we have a few
#minutes of power left. Schedule a shutdown for 2 minutes from now.
#This does, of course, assume you have power installed and your
#UPS is connected and working correctly.
pf::powerfail:/sbin/shutdown -f -h +2 "Power Failure; System Shutting Down"
#If power was restored before the shutdown kicked in, cancel it.
pr:12345:powerokwait:/sbin/shutdown -c "Power Restored; Shutdown Cancelled"
#Run gettys in standard runlevels
co:2345:respawn:/sbin/agetty -h -L 57600 ttyS1 ansi
1:2345:respawn:/sbin/mingetty tty1
2:2345:respawn:/sbin/mingetty tty2
3:2345:respawn:/sbin/mingetty tty3
4:2345:respawn:/sbin/mingetty tty4
5:2345:respawn:/sbin/mingetty tty5
6:2345:respawn:/sbin/mingetty tty6
#Run xdm in runlevel 5
#xdm is now a separate service
x:5:respawn:/etc/X11/prefdm -nodaemon
In the file /etc/securetty add a new line with the name of the serial tty for COM2:
110
Setting Up iDRAC Communication