
Users Guide
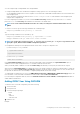


4. Click Next.
The Active Directory Configuration and Management Step 2 of 4 page is displayed.
5. Enable Active Directory and specify the location information about Active Directory servers and user accounts. Also, specify the time
iDRAC must wait for responses from Active Directory during iDRAC login.
NOTE: If certificate validation is enabled, specify the Domain Controller Server addresses and the Global Catalog
FQDN. Make sure that DNS is configured correctly under Overview > iDRAC Settings > Network.
6.
Click Next. The Active Directory Configuration and Management Step 3 of 4 page is displayed.
7. Select Standard Schema and click Next.
The Active Directory Configuration and Management Step 4a of 4 page is displayed.
8. Enter the location of Active Directory global catalog server(s) and specify privilege groups used to authorize users.
9. Click a Role Group to configure the control authorization policy for users under the standard schema mode.
The Active Directory Configuration and Management Step 4b of 4 page is displayed.
10. Specify the privileges and click Apply.
The settings are applied and the Active Directory Configuration and Management Step 4a of 4 page is displayed.
11. Click Finish. The Active Directory settings for standard schema is configured.
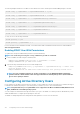
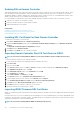
Configuring Active Directory With Standard Schema Using RACADM
To configure iDRAC Active Directory with Standard Schema using the RACADM:
1. At the racadm command prompt, run the following commands:
• Using config command:
racadm config -g cfgActiveDirectory -o cfgADEnable 1
racadm config -g cfgActiveDirectory -o cfgADType 2
racadm config -g cfgStandardSchema -i <index> -o cfgSSADRoleGroupName <common name of
the role group>
racadm config -g cfgStandardSchema -i <index> -o cfgSSADRoleGroupDomain <fully qualified
domain name>
racadm config -g cfgStandardSchema -i <index> -o cfgSSADRoleGroupPrivilege <Bit Mask
Value for specific RoleGroup permissions>
racadm config -g cfgActiveDirectory -o cfgADDomainController1 <fully qualified domain
name or IP address of the domain controller>
racadm config -g cfgActiveDirectory -o cfgADDomainController2 <fully qualified domain
name or IP address of the domain controller>
racadm config -g cfgActiveDirectory -o cfgADDomainController3 <fully qualified domain
name or IP address of the domain controller>
racadm config -g cfgActiveDirectory -o cfgADGlobalCatalog1 <fully qualified domain name
or IP address of the domain controller>
racadm config -g cfgActiveDirectory -o cfgADGlobalCatalog2 <fully qualified domain name
or IP address of the domain controller>
racadm config -g cfgActiveDirectory -o cfgADGlobalCatalog3 <fully qualified domain name
or IP address of the domain controller>
• Using set command:
racadm set iDRAC.ActiveDirectory.Enable 1
racadm set iDRAC.ActiveDirectory.Schema 2
racadm set iDRAC.ADGroup.Name <common name of the role group>
racadm set iDRAC.ADGroup.Domain <fully qualified domain name>
racadm set iDRAC.ADGroup.Privilege <Bit Mask Value for specific RoleGroup permissions>
racadm set iDRAC.ActiveDirectory.DomainController1 <fully qualified domain name or IP
address of the domain controller>
racadm set iDRAC.ActiveDirectory.DomainController2 <fully qualified domain name or IP
address of the domain controller>
racadm set iDRAC.ActiveDirectory.DomainController3 <fully qualified domain name or IP
address of the domain controller>
racadm set iDRAC.ActiveDirectory.GlobalCatalog1 <fully qualified domain name or IP
address of the domain controller>
racadm set iDRAC.ActiveDirectory.GlobalCatalog2 <fully qualified domain name or IP
address of the domain controller>
racadm set iDRAC.ActiveDirectory.GlobalCatalog3 <fully qualified domain name or IP
address of the domain controller>
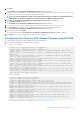
For Bit Mask values for specific Role Group permissions, see Default Role Group Privileges.
Configuring User Accounts and Privileges
119