
Users Guide


Configuring CIFS servers
To configure an CIFS server, perform the following tasks:
1.
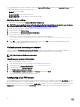
Right-click the folder that you want to configure as CIFS share and select Properties → Sharing.
2. Click the Advanced Sharing tab and select Share this folder.
3. Click the Permissions tab.
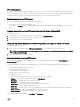
4. Click Add to add names of the users for whom you want to provide access to the CIFS share.
5. Type the names and click OK.
6. In the Permissions section under Allow column, select Full Control.
Now the selected folder is shared over network and it can be accessed over CIFS protocol by using the
\\<ip address>\share_name folder path.
NOTE: Lifecycle Controller does not support CIFS message signing feature. Therefore, you must disable the Digitally
sign communications (always) option.
Disabling the Digitally sign communications option
To disable the Digitally sign communications (always) option, perform the following tasks:
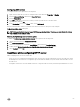
1. Open Control Panel and select Administrative Tools.
2. Click Local Security Policy.
3. On the left navigation pane, expand the Local Policies option and select Security Options.
4. Double-click the Microsoft network server: Digitally sign communications (always) option.
5. Select Disabled and click OK.
Conditions while configuring HTTP server
While configuring the HTTP servers, ensure that:
• The HTTP server is configured to the default port (80). The Lifecycle Controller web interface accesses the web server using
the default port. If the web server is configured to a port other than the default, Lifecycle Controller will not be able to access
the web server.
• The Apache web server is set as the default web server. Using other web servers may result in unexpected behavior or errors.
59