
Install Guide


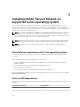
Table Of Contents
- iDRAC Service Module 2.3 Installation Guide
- Introduction
- New in this release
- iDRAC Service Module monitoring features
- Operating system information
- Lifecycle Controller log replication into operating system
- Automatic system recovery feature
- Windows Management Instrumentation Providers
- Automatic Technical Support Report collection
- Prepare to remove NVMe PCIe SSD device
- Remote iDRAC hard reset
- iDRAC access via Host OS (Experimental Feature)
- In-band support for iDRAC SNMP alerts
- Supported features — operating systems matrix
- Co-existence of Server Administrator and iDRAC Service Module
- Software availability
- Downloading iDRAC Service Module
- Accessing documents from Dell support site
- Software license agreement
- Other documents you may need
- Preinstallation setup
- Installing the iDRAC Service Module on Microsoft Windows operating systems
- Installing the iDRAC Service Module on Microsoft Windows operating systems
- Modifying the iDRAC Service Module components on Microsoft Windows operating systems
- Repairing the iDRAC Service Module on Microsoft Windows operating systems
- Uninstalling the iDRAC Service Module on Microsoft Windows operating systems
- Installing iDRAC Service Module on supported Linux operating system
- Installing the iDRAC Service Module on VMware ESXi
- Installing the iDRAC Service Module on Citrix XenServer
- Configuring the iDRAC Service Module
- Frequently asked questions
- Do I need to uninstall Open Manage Server Administrator before installing or running the iDRAC Service Module?
- How do I know that the iDRAC Service Module is installed in my system?
- How do I know which version of the iDRAC Service Module I have in my system?
- What is the minimum permission level required to install the iDRAC Service Module?
- Whenever I try to install the iDRAC Service Module, it shows an error message This is not a supported server. Consult the User Guide for additional information about the supported servers. What should I do now?
- I see the messageThe iDRAC Service Module is unable to communicate with iDRAC using the OS to iDRAC Pass-through channel in the OS log, even when the OS to iDRAC Pass-through over USBNIC is configured properly. Why do I get this message?
- Whenever I try to install the iDRAC Service Module, an error message This operating system is not supported is displayed.
- I used the remote iDRAC hard reset feature to reset the iDRAC. However, the IPMI drives is unresponsive and I am not able to troubleshoot.
- Where do I find the Replicated LifeCycle log on my Operating System?
- What are the Linux dependent packages or executables I should install while completing the Linux installation?
- I created a custom folder in Windows Event Viewer, but the LC logs are not replicated in my custom folder. What do I have to do now to replicate the LC logs?
- I chose custom install option from the Graphical User Interface during iDRAC Service Module installation and disabled a feature, but I am not able to enable the feature using any of the other interfaces. How do I enable the feature again?
- Linux installer packages

3
Installing the iDRAC Service Module on
Microsoft Windows operating systems
The iDRAC Service Module installer installs all the features on the supported operating system and
enables all the features by default.
Installing the iDRAC Service Module on Microsoft
Windows operating systems
The iDRAC Service Module installer for the supported operating systems is available on the Systems
Management Tools and Documentation DVD. You can also download the iDRAC Service Module installer
from dell.com/support/home.
You can perform a manual or an automated installation using appropriate command-line switches. You
can install the iDRAC Service Module through the
push mechanism using consoles like OpenManage
Essentials (OME).
1. Browse to SYSMGMT → iSM → Windows, and then run iDRACSvcMod.msi.
The iDRAC Service Module ˗ InstallShield Wizard is displayed.
2. Click Next.
The License Agreement is displayed.
3. Read the software license agreement, select I accept the terms in the license agreement, and then
click Next.
4. Select the Setup Type from the following options, and click Next.
• Typical – All program features are installed (Requires the most disk space).
• Custom – Customize the installation by choosing the program features you want to install along
with the location (Recommended for advanced users).
The available options are:
– Operating System Information
– Automatic System Recovery
– Lifecycle Log Replication
– Windows Management Instrumentation (WMI) Providers
– iDRAC access via Host OS
– iDRAC Hard Reset
NOTE: The following steps are applicable, only if you select the Custom option in the Setup
Type window.
NOTE: By default, the In-Band SNMP Traps and iDRAC access via Host OS features are not
enabled.
a. Choose the program features you want to install and click Next.
16