
Users Guide

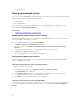

The value appears as you type it under the ASCII, but it also appears in binary to the left.
6. Click OK to save the configuration.
Configuring option 60 on Windows
To configure option 60 on Windows:
1. On the DHCP server, go to Start → Administration Tools → DHCP to open the DHCP server
administration tool.
2. Find the server and expand the items under it.
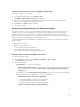
3. Right-click on IPv4 and choose Define Vendor Classes.
4. Click Add and enter the following:
• Display name — iDRAC (read-only)
• Description — Vendor Class
• Under ASCII, click and enter iDRAC.
5. Click OK.
6. On the DHCP window, right-click on IPv4 and choose Set Predefined Options.
7. From the Option class drop-down menu, select iDRAC (created in step 4) and click Add.
8. In the Option Type dialog box, enter the following information:
• Name — iDRAC
• Data Type — String
• Code — 60
• Description — Dell vendor class identifier
9. Click OK twice to return to the DHCP window.
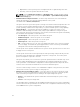
10. Expand all items under the server name, right-click on Scope Options and select Configure Options.
11. Click the Advanced tab.
12. From the Vendor class drop-down menu, select iDRAC. The 060iDRAC appears in the Available
Options column.
13. Select 060iDRAC option.
14. Enter the string value that must be sent to the iDRAC (along with a standard DHCP provided IP
address). The string value helps in importing the correct XML configuration file.
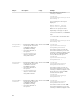
For the option’s DATA entry, String Value setting, use a text parameter that has the following letter
options and values:
• Filename — iDRAC_Config.XML or iDRAC_Config-<service-tag>.XML. (-f)
• Sharename — (-n)
• ShareType — -s (0 = NFS, 2 = CIFS)
• IPAddress — IP address of the file share. (-i)
• Username — Required for CIFS (-u)
• Password — Required for CIFS (-p)
• ShutdownType — Specify Graceful or Forced. (-d)
• Timetowait — Default is 300 (-t )
• EndHostPowerState — (-e)
52