
Users Guide

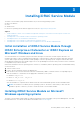
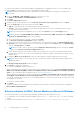

Table Of Contents
- Dell EMC iDRAC Service Module 3.6 User’s Guide
- Introduction
- Preinstallation setup
- Installing iDRAC Service Module
- Initial installation of iDRAC Service Module through iDRAC Enterprise or Datacenter or iDRAC Express on Microsoft Windows and Linux
- Installing iDRAC Service Module on Microsoft Windows operating systems
- Silent installation of iDRAC Service Module on Microsoft Windows
- Modifying iDRAC Service Module components on Microsoft Windows operating systems
- Repairing iDRAC Service Module running on Microsoft Windows operating systems
- Uninstalling iDRAC Service Module running on Microsoft Windows operating systems
- Installing the iDRAC Service Module on VMware ESXi
- Installing iDRAC Service Module on supported Linux operating systems
- Installing iDRAC Service Module when System Configuration Lock Down Mode is enabled in iDRAC
- Configuring iDRAC Servcie Module
- Security configurations and compatibility
- iSM monitoring features
- S.M.A.R.T monitoring
- Operating system information
- Lifecycle Controller log replication into operating system
- Automatic system recovery
- Windows Management Instrumentation Providers
- Prepare to remove a NVMe PCIe SSD device
- Remote iDRAC hard reset
- iDRAC access via Host OS
- Accessing iDRAC via GUI, WS-Man, Redfish, and Remote RACADM
- In-Band support for iDRAC SNMP alerts
- Enable WS-Man remotely
- Autoupdating iSM
- FullPowerCycle
- SupportAssist on the box
- Configuring the In-Band SNMP Get feature—Linux
- Configuring the In-Band SNMP Get feature—Windows
- iDRAC GUI Launcher
- Single sign-on (SSO) to iDRAC UI from host operating system administrators desktop
- IPv6 communication between iSM and iDRAC over OS-BMC Passthru
- Frequently asked questions
- Linux and Ubuntu installer packages
- Resources and support
- Contacting Dell EMC

The offline bundle is displayed.
8. Click Baselines and Groups.
9. Click create from Baselines tab, mention baseline name and select Host Extension as baseline type.
NOTE: Select the latest iDRAC Service Module version to create the baseline.
Complete the rest as per instructions.
10. Click Admin View.
11. Click Add to Baseline (against the uploaded patch name) and select the baseline name that you have created in step 8.
12. Click Compliance view. Select the Update Manager tab. Click Attach and select the Extension Baseline created in step
8 and follow the instructions.
13. Click Scan and select Patches and Extensions (if not selected by default) and click Scan.
14. Click Stage, select created Host Extension and follow the instructions.
15. Click Remediate and follow the instructions after the staging is completed.
iDRAC Service Module upgrade is complete.
NOTE: The host operating system reboots while upgrading iSM using VMware Update Manager.
NOTE: For more information about VMware Update Manager, see the VMware official website.
NOTE: You can upgrade iDRAC Service Module from the VMware Update Manager repository https://
vmwaredepot.dell.com/.
Installing iDRAC Service Module using vSphere Lifecycle Manager
in vSphere Client
NOTE: Before installing, ensure that the downloaded iSM version is compatible with VMware ESXi 7.x.
To install iSM using vSphere Lifecycle Manager (vLCM) in vSphere Client (VC), do the following:
1. Install vSphere Client (VCSA) on a supported Microsoft Windows operating system.
2. Log in to a vSphere Client using web.
3. Right-click vSphere Client host, and click New Datacenter.
4. Right-click New Datacenter, and click Add Host. Provide information for the ESXi server based on the online instructions.
5. Click Menu > Lifecycle Manager > Settings > Patch Setup > NEW, and enable the online repository.
6. Click ACTIONS > Sync Updates.
iSM VIB is downloaded into VC.
7. Select the ESXi host. Click Baselines > Attached Baselines > ATTACH > Create > Attach Baseline, and follow the
online instructions to upload the patch.
8. Click STAGE and follow the instructions.
9. After staging is complete, click REMEDIATE and follow the instructions.
iSM installation is complete.
Using the Power CLI
To install the iSM using Power CLI:
1. Install the supported PowerCLI of ESXi on the supported Microsoft Windows operating system.
2. Copy the ISM-Dell-Web-3.6.0-<bldno>.VIB-<version>i-Live.zip file to the ESXi host.
3. Navigate to the bin directory.
4. Run Connect-VIServer and provide the server and other credentials.
5. Log on to the ESXi host using supported vSphere CLI of ESXi 6.x U3, or ESXi 7.x and create a datastore.
6. Create a folder ISM-Dell-Web-3.6.0-<bldno>.VIB-<version>I on ESXi 6.x U3, or ESXi 7.x host under /vmfs/volumes/
<datastore_name> directory.
Installing iDRAC Service Module
19