
Users Guide


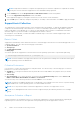


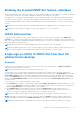
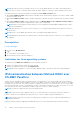
Table Of Contents
- Dell EMC iDRAC Service Module 3.4 User’s Guide
- Contents
- Introduction
- Preinstallation setup
- Installing iDRAC Service Module
- Initial installation of iDRAC Service Module through iDRAC for Windows
- Initial installation of iSM through iDRAC Express
- Initial installation of iDRAC Service Module via iDRAC for Linux
- Installing iDRAC Service Module on Microsoft Windows operating systems
- Installing iDRAC Service Module on supported Linux operating systems
- Installing the iDRAC Service Module on VMware ESXi
- Installing iDRAC Service Module when the System Configuration Lock Down Mode is enabled
- Configuring the iDRAC Service Module
- iDRAC Service Module monitoring features
- Operating system information
- Lifecycle Controller log replication into operating system
- Automatic System Recovery
- Windows Management Instrumentation Providers
- Prepare to remove NVMe PCIe SSD device
- Remote iDRAC hard reset
- iDRAC access via Host OS
- Accessing iDRAC Via GUI, WS-man, Redfish, Remote RACADM
- In-band support for iDRAC SNMP alerts
- Enable WSMAN Remotely
- Auto-updating iDRAC Service Module
- FullPowerCycle
- SupportAssist on the Box
- Enabling the In-band SNMP Get feature—Linux
- Enabling the In-band SNMP Get feature—Windows
- iDRAC GUI Launcher
- Single sign-on (SSO) to iDRAC GUI from Host OS administrators desktop
- IPv6 communication between iSM and iDRAC over OS-BMC Passthru
- Enhanced security between iSM and iDRAC communication using TLS protocol
- Frequently asked questions
- Linux and Ubuntu installer packages

iSM SupportAssist Disk Auto Dispatch
Starting iSM 3.4, if the server hits one of the following SNMP events: PDR16 and PDR63, then you get a recommendation
from Dell EMC support via email regarding the dispatch of the predictive failure or a bad disk block such as SSDs subject to the
prevailing licensing terms and conditions. Once you receive the email, you need to follow up and provide the service address to
Dell EMC support for the delivery of the dispatched parts.
NOTE: This feature is available only on Windows operating systems.
iSM 3.4.0 supports filter and non-filter OSApp Collection (OS and Application Data collection) on ESXi. This selection can be
made from Collection Preferences.
Non-filtered selected Collection contains vmsupport logs for Logs, Network, Storage, Configuration, Installer, HungVM,
PerformanceSnapshot, VirtualMachines, and hostProfiles.
Filtered selected Collection contains vmsupport logs for Storage, Configuration, Installer, HungVM,
PerformanceSnapshot, VirtualMachines, and hostProfiles.
Enabling the In-band SNMP Get feature—Linux
Install and configure net-snmp package to accept SNMP requests from remote systems. This feature is disabled by default.
For installing the in-band SNMP get feature through setup.sh installer complete the following tasks:
1. Start the iSM installation using the setup.sh script by executing ./setup.sh
2. Review the license agreement and accept to proceed with the installation.
3. On the next page, the list of features are shown. Select the Access via SNMP Get sub option under the iDRAC access via
Host OS feature by entering 4.c , and press Enter.
4. After the feature is enabled, start the installation process of the selected features by entering I and press Enter.
5. After the installation is finished successfully, start the iDRAC Service Module process.
If SNMP Agent service is not enabled on iDRAC, iSM configures and enables the SNMP Agent.
6. To view the SNMP Agent properties, on the iDRAC GUI, Go to Settings.
7. Click iDRAC Service Module Setup.
8. Under Monitoring session, view that SNMP Get via Host OS option is enabled.
9. Open a new ‘PuTTY Configuration’ window, provide your Host Name IP address and click Open.
10. Click Yes, for the PuTTY Security Alert.
11. Log in to iDRAC using the proper credentials.
12. Type
racadm get iDRAC.ServiceModule.HostSNMPGet
and enter.
You can view that HostSNMPGet is enabled.
NOTE:
If the In-Band SNMP Get feature was not enabled during the Installation of iSM, it can be enabled later through
iDRAC GUI/Racadm command.
● Through iDRAC GUI — iDRAC Settings->Settings->iDRAC Service Module Setup->Enable SNMP Get via
Host OS->Enable or Disable
● Through Racadm — racadm set idrac.servicemodule.HostSnmpGet "Enabled"or "Disabled"
NOTE: iDRAC GUI/Racadm commands for In-Band SNMP Get feature is applicable only for 14
th
Generation of servers.
On 12
th
and 13
th
Generation servers, you must use the iSM installer for enabling/disabling this feature.
NOTE: When SNMP Get feature is enabled, it creates an iDRAC user “iSMSnmpUser” for SNMPv3 support internally.
If the user already exists, iSM logs an error message saying "Unable to create the "iSMSnmpUser" on iDRAC because
the username already exists. Then SnmpGet via Host OS feature is disabled." and the feature is disabled. In such cases,
the you must remove the “iSMSnmpUser” in iDRAC and disable and enable the Enable SNMP Get via Host OS feature
on iDRAC GUI once again. The user, “iSMSnmpUser” created by iSM is deleted when the feature is disabled or iSM is
uninstalled.
38 iDRAC Service Module monitoring features