
Users Guide


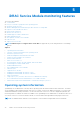
Table Of Contents
- Dell EMC iDRAC Service Module 3.4 User’s Guide
- Contents
- Introduction
- Preinstallation setup
- Installing iDRAC Service Module
- Initial installation of iDRAC Service Module through iDRAC for Windows
- Initial installation of iSM through iDRAC Express
- Initial installation of iDRAC Service Module via iDRAC for Linux
- Installing iDRAC Service Module on Microsoft Windows operating systems
- Installing iDRAC Service Module on supported Linux operating systems
- Installing the iDRAC Service Module on VMware ESXi
- Installing iDRAC Service Module when the System Configuration Lock Down Mode is enabled
- Configuring the iDRAC Service Module
- iDRAC Service Module monitoring features
- Operating system information
- Lifecycle Controller log replication into operating system
- Automatic System Recovery
- Windows Management Instrumentation Providers
- Prepare to remove NVMe PCIe SSD device
- Remote iDRAC hard reset
- iDRAC access via Host OS
- Accessing iDRAC Via GUI, WS-man, Redfish, Remote RACADM
- In-band support for iDRAC SNMP alerts
- Enable WSMAN Remotely
- Auto-updating iDRAC Service Module
- FullPowerCycle
- SupportAssist on the Box
- Enabling the In-band SNMP Get feature—Linux
- Enabling the In-band SNMP Get feature—Windows
- iDRAC GUI Launcher
- Single sign-on (SSO) to iDRAC GUI from Host OS administrators desktop
- IPv6 communication between iSM and iDRAC over OS-BMC Passthru
- Enhanced security between iSM and iDRAC communication using TLS protocol
- Frequently asked questions
- Linux and Ubuntu installer packages

4. Right-click New Datacenter and click Add Host. Provide information for the ESXi server per online instructions.
5. Right-click the ESXi host added in step 4 and click Maintenance Mode.
6. From Plug-ins, select Manage Plug-ins > download VMware Update Manager. (The status is enabled if the download is
successful.) Follow the instructions to install the VUM client.
7. Select the ESXi host. Click Update Manager > Admin view > Patch Repository > Import Patches and follow the online
instructions to upload the patch successfully.
The offline bundle is displayed.
8. Click Baselines and Groups.
9. Click create from Baselines tab, mention baseline name and select Host Extension as baseline type.
Complete the rest as per instructions.
10. Click Admin View.
11. Click Add to Baseline (against the uploaded patch name) and select the baseline name that you have created in step 8.
12. Click Compliance view. Select the Update Manager tab. Click Attach and select the Extension Baseline created in step
8 and follow the instructions.
13. Click Scan and select Patches and Extensions (if not selected by default) and click Scan.
14. Click Stage, select created Host Extension and follow the instructions.
15. Click Remediate and follow the instructions once the staging is completed.
iDRAC Service Module installation is complete.
NOTE: For more information on VMWare Update Manager, see the VMWare official website.
NOTE: You can install iDRAC Service Module from the VUM repository https://vmwaredepot.dell.com/.
Upgrading iDRAC Service Module using VMware Update Manager
To upgrade iDRAC Service Module using VMware Update Manager (VUM):
1. Install VMware vSphere 6.5 or later versions (vCenter Server, vSphere Client, and VMware vSphere Update Manager) on a
supported Microsoft Windows operating system.
2. On the desktop, double-click VMware vSphere Client and login to vCenter Server.
3. Right-click vSphere Client host and click New Datacenter.
4. Right-click New Datacenter and click Add Host. Provide information for the ESXi server per online instructions.
5. Right-click the ESXi host added in step 4 and click Maintenance Mode.
6. From Plug-ins, select Manage Plug-ins > download VMware Update Manager. (The status is enabled if the download is
successful.) Follow the instructions to install the VUM client.
7. Select the ESXi host. Click Update Manager > Admin view > Patch Repository > Import Patches and follow the online
instructions to upload the patch successfully.
The offline bundle is displayed.
8. Click Baselines and Groups.
9. Click create from Baselines tab, mention baseline name and select Host Extension as baseline type.
NOTE: Select the latest iDRAC Service Module version to create the baseline.
Complete the rest as per instructions.
10. Click Admin View.
11. Click Add to Baseline (against the uploaded patch name) and select the baseline name that you have created in step 8.
12. Click Compliance view. Select the Update Manager tab. Click Attach and select the Extension Baseline created in step
8 and follow the instructions.
13. Click Scan and select Patches and Extensions (if not selected by default) and click Scan.
14. Click Stage, select created Host Extension and follow the instructions.
15. Click Remediate and follow the instructions after the staging is completed.
iDRAC Service Module upgrade is complete.
NOTE: The Host OS will reboot while upgrading iSM using VMware Update Manager.
NOTE: For more information about VMware Update Manager, see the VMware official website.
Installing iDRAC Service Module 25