
Install Guide

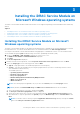


Table Of Contents
- iDRAC Service Module 2.4 Installation Guide
- Contents
- Introduction
- New in this release
- iDRAC Service Module monitoring features
- Operating system information
- Lifecycle Controller log replication into operating system
- Automatic system recovery feature
- Windows Management Instrumentation Providers
- Automatic Technical Support Report collection
- Prepare to remove NVMe PCIe SSD device
- Remote iDRAC hard reset
- iDRAC access via Host OS (Experimental Feature)
- In-band support for iDRAC SNMP alerts
- Supported features — operating systems matrix
- Co-existence of Server Administrator and iDRAC Service Module
- Software availability
- Downloading iDRAC Service Module
- Accessing documents from the Dell EMC support site
- Software license agreement
- Other documents you may need
- Preinstallation setup
- Installing the iDRAC Service Module on Microsoft Windows operating systems
- Installing the iDRAC Service Module on Microsoft Windows operating systems
- Modifying the iDRAC Service Module components on Microsoft Windows operating systems
- Repairing the iDRAC Service Module on Microsoft Windows operating systems
- Uninstalling the iDRAC Service Module on Microsoft Windows operating systems
- Installing iDRAC Service Module on supported Linux operating system
- Installing the iDRAC Service Module on VMware ESXi
- Installing the iDRAC Service Module on Citrix XenServer
- Configuring the iDRAC Service Module
- Frequently asked questions
- Linux installer packages

Following are the steps to install iDRAC Service Module on nano operating system:
1. Open a PowerShell console as an administrator and navigate to the iDRAC Service Module folder.
2. To install iDRAC Service Module, you must add the Appx package to the iDRAC Service Module folder. Type Add-
AppxPackage .\iDRACSvcMod.appx.
The installation process is initiated and completed successfully.
3. Type Get-AppxPackage command to view details of the package in the folder.
You can view details such as, Name of the package, publisher, version, location where it is installed, and such relevant
information.
4. Start the iDRAC Service module service. Type net start iDRAC Service Module”, where iDRAC Service
Module is the name of the package.
The iDRAC Service Module service is started successfully.
Uninstalling iDRAC Service Module on Nano operating system
To uninstall iDRAC Service Module on the nano operating system, the iDRAC Service Module service must be stopped.
Following are the steps to uninstall iDRAC Service Module on nano operating system:
1. Type Get-AppxPackage command to view details of the package in the folder.
You can view details such as, Name of the package, publisher, version, location where it is installed, and such relevant
information.
2. To stop the iDRAC Service Module service, type net stop “iDRAC Service Module”, where iDRAC Service
Module is the name of the package.
The iDRAC Service Module service is stopped successfully.
3. To uninstall iDRAC Service Module, type Remove-AppxPackage <Full name of the package>, where <Full name
of the package> is listed as PackageFullName in the package details.
Modifying the iDRAC Service Module components on
Microsoft Windows operating systems
To modify iDRAC Service Module components:
1. Browse to SYSMGMT > iSM > Windows, and then run iDRACSvcMod.msi.
The iDRAC Service Module ˗ InstallShield Wizard is displayed.
2. Click Next.
3. Select Modify.
4. Enable or disable the features as required and then click Next.
The Lifecycle Controller Log Replication window is displayed.
5. Specify the location where you need the LC logs to be replicated. By default, Typical (Windows Logs/System) option is
selected and the LC logs are replicated in the System group of the Windows Logs folder in the Event Viewer. Click Next.
NOTE:
You can also create a custom group in the Application and Services Log folder by selecting the Custom
option in the Lifecycle Controller Log Replication window.
NOTE: You may have to restart the system in the following scenarios:
● If you switch between Typical (Windows Logs/System) and Custom options.
● If you switch from one custom folder to another folder.
The Ready to install screen is displayed.
6. Provide a unique port number to be used by iDRAC access via Host OS feature.
NOTE: Provide a port number between the range 1024 to 65535.
NOTE: If you do not provide a port number, port number 1266 or a previously configured port (if any) is assigned by
default.
7. Click Install to continue the process.
You can also click Back to change the preferences.
Installing the iDRAC Service Module on Microsoft Windows operating systems
15