
Deployment Guide
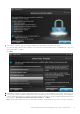
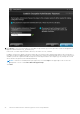
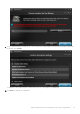

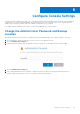
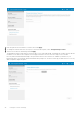

Table Of Contents
- Dell Encryption Personal Installation Guide v11.1
- Contents
- Overview
- Requirements
- Download the Software
- Installation
- Advanced Authentication and Encryption Personal Setup Wizards
- Configure Console Settings
- Uninstall the Master Installer
- Uninstall Using the Child Installers
- Data Security Uninstaller
- Policies and Template Descriptions
- Policies
- Template Descriptions
- Aggressive Protection for All Fixed Drives and External Drives
- PCI Regulation Targeted
- Data Breach Regulation Targeted
- HIPAA Regulation Targeted
- Basic Protection for All Fixed Drives and External Drives (Default)
- Basic Protection for All Fixed Drives
- Basic Protection for System Drive Only
- Basic Protection for External Drives
- Encryption Disabled
- Extract Child Installers
- Troubleshooting
- Glossary

Configure Console Settings
Default settings allow administrators and users to use advanced authentication immediately after activation, without additional
configuration. Users are automatically added as advanced authentication users when they log on to the computer with their
Windows passwords but, by default, multi-factor Windows authentication is not enabled.
To configure advanced authentication features, you must be an administrator on the computer.
Change the Administrator Password and Backup
Location
After advanced authentication activation, the administrator password and backup location can be changed, if necessary.
1. As an administrator, launch the Dell Data Security Console from the desktop shortcut.
2. Click the Administrator Settings tile.
3. In the Authentication dialog, enter the administrator password that was set up during activation, and click OK.
4. Click the Administrator Settings tab.
5. In the Change Administrator Password page, to change the password, enter a new password that is between 8-32
characters and includes at least one letter, one number, and one special character.
6
Configure Console Settings 27