
Install Guide
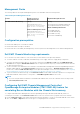
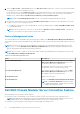
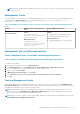
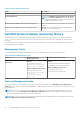
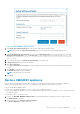
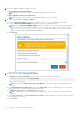


Figure 8. Backup OMIMSSC appliance wizard
3. In the CIFS share path for backup field, type the CIFS share path of the backup files.
NOTE: Ensure that the CIFS share for backup is in the same domain as the SCOM Management server.
4. In the Credential Profile for CIFS share field, select the Credential Profile to access the share path or create new
Windows Credential profile by selecting Create new. For more information about credential profile, see Dell EMC
OpenManage Integration Version 7.2 for Microsoft System Center for Operations Manager
User’s Guide.
5. To encrypt the backup file, in Password for backup file, enter a password.
6. In Retype password, enter the password again.
7. Click Test Connection.
If the Test connection is successful, a message is displayed on successful connectivity with the provided CIFS share
location.
8. Click Backup to complete the backup process.
The Backup Success message is displayed.
NOTE: The Backup file is in zip format.
9. Click Close.
Restore OMIMSSC appliance
Restores all the enrolled SCOM consoles, discovered devices along with license information, jobs running in OMIMSSC
dashboard, credential profiles, device discovery configuration settings and information about Proxy MS.
Restore the OMIMSSC appliance data:
● Restore the old OMIMSSC appliance versions 7.1 and 7.1.1 by using an IP address.
● Restore the OMIMSSC appliance version 7.2 and later and for migrating to the same appliance version 7.2 and later versions
by using CIFS share.
To perform the restore, follow these steps:
1. Log in to the Dell EMC OMIMSSC Admin portal as the default admin by providing password in the password field.
The Admin Portal is displayed.
2. On the left pane, select Settings > Restore Appliance.
The Restore Appliance wizard is displayed.
Backup, restore, and update OMIMSSC
57