
Install Guide

Setting up the Dell EMC OMIMSSC appliance
Ensure that the following requirements are met on the Hyper-V and ESXi host where you are setting up OMIMSSC appliance:
● Virtual switch or VM network is enabled within the network of the management group to communicate with the OMIMSSC
appliance and the MS.
● Ensure to have sufficient memory resources available for VM on Hyper-V and ESXi host. For more information on resources,
see Common system requirements for OMIMSSC.
Install the Dell EMC OMIMSSC appliance using one of the following methods:
1. When you are using Hyper-V, then deploy a virtual machine using a .vhd file. For more information, see Deploy and
configure the OMIMSSC appliance VM on hyper-v.
2. When you are using VMware ESXi version 6.5 and later, then deploy a virtual machine using an .ova file. For more
information, see Deploy and configure the OMIMSSC appliance VM on VMware ESXi.
You can set up an NTP server to sync time between hyper-V host or ESXi host and SCOM Management Server.
Deploy and configure the OMIMSSC appliance VM on
Hyper-V
For setting up the OMIMSSC, deploy a virtual machine on hyper-v using .vhd file:
1. In Hyper-V Manager, from the Actions menu, select New and click Virtual Machine Manager
The New Virtual Machine Wizard is displayed.
2. In Before You Begin, click Next.
3. In Specify Name and Location, provide a name for the virtual machine.
If you want to store the VM in a different location, then select Store the virtual machine in a different location, click
Browse, and traverse to the new location.
4. In Specify Generation, select Generation 1, and then click Next.
5. In Assign Memory, assign the memory capacity that is mentioned in the prerequisite.
6. In Configure Networking > Connection, select the network that you want to use, and then click Next.
7. In Connect Virtual Hard Disk, select Use an existing virtual hard disk, traverse to the location where the OMIMSSC—
v7.2 VHD file is present, and select the file.
8. In Summary, confirm the details that you have provided and click Finish.
9. Set the Number of virtual processors count value to 4, since by default the processor count is set to 1.
To set the processor count:
a. Right-click Appliance, and select Settings.
b. In Settings, select Processor, and set Number of virtual processors to 4.
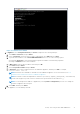
10. Ensure the synchronization of time between hyper-V host and the SCOM Management Server.
11. Enable the Time synchronization option on the VM hosted on hyper-V.
a. Select the VM, hosted on hyper-V.
b. Right-click the VM, and select Settings.
c. Select Management > Integration Services > Time Synchronization.
Verify OMIMSSC appliance Virtual Machine hosted on hyper-V
To verify that the Appliance VM is configured appropriately, select and then right-click the Appliance VM, click Settings, and
then perform the following tasks:
1. Check if the allocation of memory for the appliance is as per the requirement mentioned in the Common system
requirements for OMIMSSC. Else provide the memory in Startup RAM, and click Apply.
2. Check if the processor count is as per the requirement mentioned in the Common system requirements for OMIMSSC. Else
provide the number of processor counts in Number of Virtual processors count under Processors.
Install, and configure Dell EMC OMIMSSC
15