
Users Guide
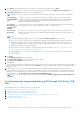
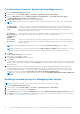
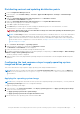
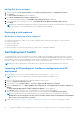

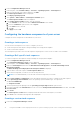
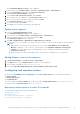
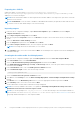
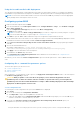
Table Of Contents
- Dell EMC Server Deployment Pack Version 4.1 for Microsoft System Center Configuration Manager User's Guide
- Contents
- Introduction
- Before using Configuration Manager
- Using the Dell EMC Server Deployment Pack on systems running System Center Configuration Manager
- Dell Driver CAB files
- Importing Dell Driver CAB files for creating boot image
- Upgrading Dell Driver CAB files
- Customizing boot image and deploying OS through Dell Driver CAB files
- Creating a boot image for deploying PowerEdge servers
- Enabling command prompt for debugging boot images
- Distributing content and updating distribution points
- Configuring the task sequence steps to apply operating system image and driver package
- Deploying a task sequence
- Dell Deployment ToolKit
- Importing a DTK package for hardware configuration and OS deployment
- Upgrading a DTK package
- Customizing boot image, configuring hardware and deploying OS through DTK
- System Lockdown Mode
- Configuring the hardware components of your server
- Configuring task sequence actions
- Creating task sequences for RAID, and iDRAC
- Importing Dell Server Driver Packages
- Dell Driver CAB files
- Troubleshooting
- Command line options
- Other Dell documents you might need

Using the bootable media for OS deployment
The operating system deployment is unattended unless the tasks in the task sequence require it. For example if the Windows
serial number is not provided in the task sequence, the Windows operating system waits for it during the deployment process.
NOTE: You can use the same bootable media for all servers entered in the .CSV file, provided you select the appropriate
driver packages in the task sequence on the site server.
Configuring system BIOS
1. Right-click the task sequence and click Edit.
2. From the left hand side of the Task Sequence Editor, under Configure Hardware > Step 1 , click Set BIOS Config (ini
file) > Action Settings tab.
3. From the Configuration action type drop-down list, select BIOS Config (ini file).
The View button is enabled.
NOTE: You can also select BIOS Config (command line) if you want to configure the system by using the CLI option.
For more information about the CLI option usage, see Command Line Options.
4. Click View to open the .ini file. Make modifications as per the configurations required and save the file.
For information about the .ini file format, see the “Sample File Formats” section in the Dell OpenManage Deployment Toolkit
Command Line Interface Reference Guide available at Dell.com/support/manuals.
5. Select Save to a file in the toolkit package for this custom action when I click OK in the pop-up message, and then
click OK.
6. Save the file in the default directory.
An example of default directory: \\<site server hostname>\sms_<site
code>\OSD\lib\Packages\Deployment\Dell\PowerEdge\DTK\Template\Configs\Syscfg.
7. Click Apply to save the edited file to the task sequence.
8. Select Set from the Action: drop-down menu.
The Configuration file/Command line parameters field is enabled. For more information, see Configuration file/
Command line Parameter Options.
Alternatively, you can select the <Create configuration file> option from the drop-down list to create a .ini file from the
start .
Configuring file or command line parameter options
There are three options you can choose from:
● <Create configuration file>
● <Import configuration file>
● Edit <syscfg.ini>
After creating the .ini file using any of above options, click Apply in the Task Sequence Editor window. The task sequence
for Set BIOS Config (ini file) is created.
CAUTION:
When you update or save a new file in the package, it is not automatically updated on all of its
distribution points. To make sure that the new file is available to systems that need it, you must update the
distribution points from the Software Distribution→ Packages→ Dell PowerEdge Deployment→ Dell PowerEdge
Deployment ToolKit Integration <version> node.
<Create configuration file>
On selecting the <Create configuration file> option, the Create button is displayed.
1. Click Create.
2. Do one of the following in the Configuration File Editor:
● Click Import File to import an existing .ini file from a directory.
● Create an online .ini file in the Configuration File Editor field and click OK. This prompts you to save the .ini file you
created to a local drive or network share of your choice.
3. If you select the Save these changes to the existing file in the toolkit package when I click OK option, your
configuration is exported to a file when you click OK.
Using the Dell EMC Server Deployment Pack on systems running System Center Configuration Manager
19