Dell EMC Repository Manager Version 3.3.1 Quick Start Guide July 2020 Rev.
Notes, cautions, and warnings NOTE: A NOTE indicates important information that helps you make better use of your product. CAUTION: A CAUTION indicates either potential damage to hardware or loss of data and tells you how to avoid the problem. WARNING: A WARNING indicates a potential for property damage, personal injury, or death. © 2018 - 2020 Dell Inc. or its subsidiaries. All rights reserved. Dell, EMC, and other trademarks are trademarks of Dell Inc. or its subsidiaries.
Contents Chapter 1: Introduction................................................................................................................... 4 Prerequisites for installing DRM...........................................................................................................................................4 Hardware requirements..................................................................................................................................................
1 Introduction The Dell EMC Repository Manager (DRM) ensures that the systems are up-to-date with the latest BIOS, driver, firmware, and software. DRM allows you to: • • • Create repositories of customized components and updates. Create groups of related updates for systems running the Microsoft Windows and Linux operating system . Generate comparison reports and update baselines of custom repositories. The customized repositories are made up of Dell EMC Update Packages (DUPs) or Non-DUPs (such as .exe, .
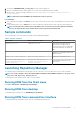
Downloading DRM You can download DRM from DRM Knowledge Base page or dell.com/support. To download DRM from dell.com/support 1. In the support site, click Drivers & Downloads. 2. In Enter a Service Tag, Serial Number, Service Request, Model, or Keyword search box, provide the system details. 3. In Drivers & Downloads section, all the applicable drivers are displayed. You can manually search the complete list or use the different search fields to find the DRM installer. 4.
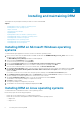
2 Installing and maintaining DRM This chapter lists the prerequisites and the procedure to install or uninstall DRM.
1. Download the software from the support site. 2. Open the command-line interface and navigate to the location where the DRM installer file is available. 3. On the interface, enter the following command Change Dell EMC Repository Manager Installation.exe -i silent -uninstall NOTE: Ensure that you install DRM on the default path to work as expected. Post-installation: 1. After completing the installation, the drmuser user account is created.
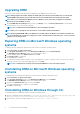
Upgrading DRM When a new version of DRM is released, a bell alert is displayed on the Graphical User Interface (GUI). NOTE: During upgrade, the installer displays the default path even if the previous installation was on a custom path. Upgrade DRM in default path. If you provide a different location, manually delete the old files in previous path. NOTE: When you are migrating from DRM 2.x version to DRM 3.x version, ensure that you upgrade to 3.0 and then upgrade to the specific DRM 3.x version. 1.
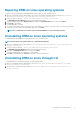
Repairing DRM on Linux operating systems To repair the repository manager through Graphical User Interface (GUI) on Linux operating systems: 1. Open the command line interface and navigate to the location where DRM is installed. By default, the path is set to /opt/dell/ dellemcrepositorymanager/_Dell EMC Repository manager_installation. 2. Enter the following command- ./Change Dell EMC Repository Manager Installation. The Dell EMC Repository Manager wizard is opened in maintenance mode. 3.