
FAQ
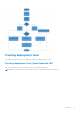
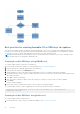

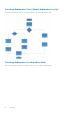
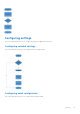
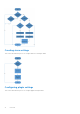
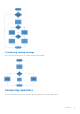
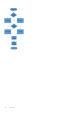
Table Of Contents
- Dell EMC Repository Manager Version 3.3.2 Troubleshooting Guide
- Contents
- Overview
- Frequently asked questions

Best practice for creating bootable CD or USB keys for updates
You can create bootable USB keys for updates, using any third party or free tool. You can start your managed system by the
bootable CD or USB storage. After the system starts, it automatically runs the selected updates. After the update is complete,
you can remove the CD or USB storage, and reboot the system to your host operating system.
NOTE:
Rufus and UNetBootin are third-party software. Install and use these software at your own risk. Dell EMC shares
only the best practices for using Rufus and UNetBootin.
Creating bootable USB keys using UNetBootin
To create bootable USB keys, using the tool UNetBootin:
1. Download the UNetBootin for Windows or Linux available at https://unetbootin.github.io/.
2. Run the Dell Repository Manager and generate the bootable ISO.
3. Start UNetBootin and select the Diskimage option.
4. Click […] adjacent to the ISO drop-down menu and navigate to the ISO created by Dell Repository Manager.
5. Ensure that the type setting is equal to USB drive and the location where you want to download the USB key displays in the
drive drop-down menu.
6. Click OK to start the USB writing.
7. After the USB key writing is complete, insert the USB key into a USB port on the system you want to upgrade.
8. Press <F11>.
The boot menu is displayed.
9. Select option 1 in the UNetBootin boot menu to proceed with the component updates.
To create bootable USB keys, using non-graphical user interface, provide the following command line:
>unetbootin method=diskimage isofile="/home/user/LinuxISO.iso" installtype=USB
targetdrive=/dev/sdc1
Creating bootable USB keys using Rufus tool
To create bootable USB keys, using Rufus tool.
1. Download the latest version of Rufus for Windows available at https://rufus.ie/en_IE.html
12
Overview