Dell EMC Repository Manager Version 3.
Notes, cautions, and warnings NOTE: A NOTE indicates important information that helps you make better use of your product. CAUTION: A CAUTION indicates either potential damage to hardware or loss of data and tells you how to avoid the problem. WARNING: A WARNING indicates a potential for property damage, personal injury, or death. © 2018 - 2020 Dell Inc. or its subsidiaries. All rights reserved. Dell, EMC, and other trademarks are trademarks of Dell Inc. or its subsidiaries.
Contents 1 Introduction................................................................................................................................. 4 Prerequisites for installing DRM...........................................................................................................................................4 Hardware requirements..................................................................................................................................................
1 Introduction The Dell EMC Repository Manager (DRM) ensures that the systems are up-to-date with the latest BIOS, driver, firmware, and software. DRM allows you to: • • • Create repositories of customized components and updates. Create groups of related updates for systems running the Microsoft Windows and Linux operating system . Generate comparison reports and update baselines of custom repositories. The customized repositories are made up of Dell EMC Update Packages (DUPs) or Non-DUPs (such as .exe, .
NOTE: You can use the local repositories on DRM without internet connectivity. • CD/DVD or USB burning software – To create a bootable CD/DVD or bootable USB. Downloading DRM You can download DRM from DRM Knowledge Base page or dell.com/support. To download DRM from dell.com/support 1. In the support site, click Drivers & Downloads. 2. In Enter a Service Tag, Serial Number, Service Request, Model, or Keyword search box, provide the system details. 3.
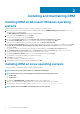
2 Installing and maintaining DRM Installing DRM on Microsoft Windows operating systems To install DRM through a graphical user interface on Microsoft Windows operating systems: 1. Browse to the location where the DRM installer is available. Double-click the , where x.x.xxx is the latest version or the build number. The DELL EMC Repository Manager installation wizard is displayed. 2. After reviewing the Introduction screen, click Next.
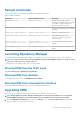
Sample commands This section describes some of the sample commands used in installing and using DRM. Table 2. Sample commands Linux syntax Microsoft Windows syntax Description /DRMInstaller.bin DRMInstaller.exe DRM installer is opened, only if the operating system supports GUI. If operating system does not support GUI then the installation proceeds without GUI. ./drm –h or ./drm –-help drm /? or drm /h Displays the command line options and help information. ./drm –v or .
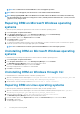
NOTE: It is recommended to relaunch DRM after a successful upgrade operation. NOTE: After a successful upgrade, clear the browser's cache and then relaunch the OLH files. NOTE: During upgrading DRM on Microsoft Windows Server 2016 or Microsoft Windows Server 2019, the installer may not run automatically due to windows security policies. Hence, manually run the installer file from C:\Users\username \AppData\Local\Temp location.
5. To complete the installation and the changes to reflect in the application, you have to restart the system. You also have the option to restart the system later. After selecting the appropriate option, click Done. NOTE: It is recommended to restart the system and launch DRM after a successful repair operation.