
Install Guide

Launching Repository Manager
You can launch Repository Manager from the desktop, from the Start menu or, from the folder location where you have installed it. To run
Repository Manager from the folder location on the system:
Click Start > All Programs > Dell EMC Repository Manager.
NOTE: You can also navigate to the location where DRM is installed. By default, DRM is installed at C:\Program Files\Dell
\DELL EMC Repository Manager.
Running DRM from the Start menu
Click Start > All Programs > Dell EMC Repository Manager v<version number of Repository Manager>.
Run Repository Manager from your desktop
To run DRM using the desktop icon, click Dell EMC Repository Manager.
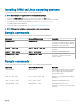
Running DRM using command line options
To launch DRM through command line options, open the command prompt and type drm.
Updating DRM
On the Dell EMC Repository Manager drop-down list, in the Settings section, click on Check for New Version to update to the latest
version of the repository manager.
Repairing DRM on Microsoft Windows operating
systems
To repair the repository manager through interactive mode on Microsoft Windows operating systems:
1 Click Control panel > Programs and Features.
2 In the Programs and Features window, select Dell Repository Manager, and click Uninstall/Change.
The Dell EMC Repository Manager wizard is opened in maintenance mode.
3 From the available options, select Repair Product. By default, the Uninstall Product option is selected. Click Next.
4 Click Install to repair DRM. Click Previous if you want to review the preferences.
The DRM application is repaired.
5 To complete the installation and the changes to reect in the application, you have to restart the system. You also have the option to
restart the system later. After selecting the appropriate option, click
Done.
8
Installing and uninstalling DRM