
Install Guide
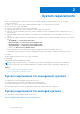
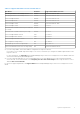

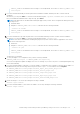
Table Of Contents
- Dell OpenManage Plug-in Version 2.0 for Nagios Core Installation Guide
- Contents
- Introduction to the Dell OpenManage Plug-in Version 2.0 for Nagios Core
- System requirements
- Downloading and installing the Dell OpenManage Plug-in Version 2.0 for Nagios Core
- Upgrading to Dell OpenManage Plug-in Version 2.0 for Nagios Core
- Uninstalling the Dell OpenManage Plug-in Version 2.0 for Nagios Core
- Accessing support content from the Dell EMC support site
- Related Documentation

Upgrading to Dell OpenManage Plug-in
Version 2.0 for Nagios Core
You can upgrade from Dell OpenManage Plug-in Version 1.0 for Nagios Core to Dell OpenManage Plug-in Version 2.0 for Nagios
Core by performing the following steps:
1. Download the latest Dell OpenManage Plug-in Version 2.0 for Nagios Core installer from the Dell support website at
Dell.com/support or from Nagios exchange at exchange.nagios.org/.
The installer is packaged as a .tar.gz file named Dell_OpenManage_Plugin_v2.0_Nagios_Core_A00.tar.gz.
2. Navigate to the location where you have downloaded the folder, and run the following command to extract its contents:
tar -zxvf Dell_OpenManage_Plugin_v2.0_Nagios_Core_A00.tar.gz
The following folder and files are extracted:
● Dell_OpenManage_Plugin folder
● Dell_OM_Plugin_2_0_For_NagiosCore_IG.pdf file
● Dell_OM_Plugin_2_0_For_NagiosCore_ReadMe.txt file
● license_en.txt file
3. Navigate to the Dell_OpenManage_Plugin/Install folder, and then run the following command to invoke the
installer:
./install.sh
4. Press Y if Nagios Core version 3.5.0 or later is installed in your system, or press any other key to exit the installation process,
install Nagios Core version 3.5.0 or later and then begin the installation process once again.
Alternatively, you can press Enter to continue with the default value (Y).
5. When prompted for the installed Nagios Core location, provide the path, and then press Enter.
Alternatively, you can press Enter to continue with the default location, /usr/local/nagios.
An invalid entry will display an error and exit the installation process.
A prerequisite check is run and the installed perquisites are displayed.
NOTE:
If Net-IP or both Net-SNMP and OpenWSMAN are not installed in your system, then the installation process will
exit. Ensure that the prerequisites are met and then begin the installation process once again.
If any of the other prerequisites are not met, then the installation procedure will display an appropriate message and continue
with the installation.
6. When prompted to upgrade to Dell OpenManage Plug-in Version 2.0 for Nagios Core, press Y. Alternatively, you can press
Enter to continue with the default value (Y).
If you do not want to upgrade, press any other key to exit the installation process.
7. Press Y if you accept the End User License Agreement, or any other key to exit the installation.
Alternatively, you can press Enter to continue with the default value (Y).
8. If you have installed SNMPTT, provide the path where SNMPTT is installed, and then press Y to continue with the
installation.
Alternatively, you can press Enter to continue with the default file path, /etc/snmp/snmptt.ini. If you have not
installed SNMPTT and want to skip this step, press Enter.
NOTE:
If SNMPTT was not installed while installing this plug-in, but you later want to receive SNMP alerts, perform the
following actions:
● Install SNMPTT.
● Navigate to <NAGIOS_HOME>/dell/install, and then run the following command:
./install.sh trap
4
10 Upgrading to Dell OpenManage Plug-in Version 2.0 for Nagios Core