
Users Guide
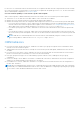
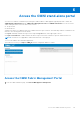

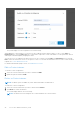
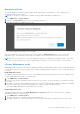

Table Of Contents
- OpenManage Network Integration for SmartFabric Services User Guide Release 2.1
- Contents
- About this guide
- Change history
- Overview of OMNI, SFS, VxRail, and PowerEdge MX
- OpenManage Network Integration
- OMNI vCenter integration
- Access the OMNI stand-alone portal
- Access the OMNI Fabric Management Portal
- OMNI Appliance Management user interface
- SmartFabric management with OMNI
- OMNI feature support matrix
- View SmartFabric instance overview
- View fabric topology
- Manage switches in a fabric
- SmartFabric bulk configuration
- Configure server interface profile
- Configure and manage uplinks
- Configure networks and routing configuration
- Configure global settings for SmartFabric
- View fabric events and compliance status
- OMNI automation support for PowerEdge MX SmartFabric
- OMNI automation support for NSX-T
- Lifecycle management
- Troubleshooting
- Troubleshooting tools
- Unable to add SmartFabric instance in OMNI
- Missing networks on server interfaces
- Unable to launch OMNI UI
- OMNI plug-in does not show service instance
- Unable to register the vCenter in OMNI
- OMNI is unable to communicate with other devices
- Timestamp not synchronized in OMNI
- Reset OMNI VM password

The system displays a vCenter registration successful message.
When adding the vCenter instance, you can choose only to add the instance and not register. To do so, select False for
Registered option. Selecting False adds the vCenter and no register the vCenter with OMNI. You can register later without
entering the credentials again by changing the status.
You can choose not to enable the automation services for the vCenter by selecting False for Automation option. Selecting
False creates the automation service for the specific vCenter. You can start the automation service for the vCenter whenever
required, see vCenter Maintenance mode.
For Enhanced Link Mode (ELM) vCenter, see OMNI behavior in ELM.
Edit a vCenter instance
To edit the vCenter configuration:
1. Select the vCenter instance that you want to edit and click Edit.
2. Update the password and click Edit.
Delete a vCenter instance
NOTE: The delete option is available only when OMNI is launched as a stand-alone UI.
To delete the vCenter configuration:
1. Select the vCenter instance that you want to delete and click Delete.
2. Click Delete to confirm the deletion.
The system displays deletion success message.
NOTE: The delete action first unregister the vCenter and delete the vCenter instance.
48 Access the OMNI stand-alone portal