
Users Guide
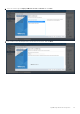
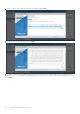
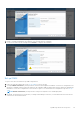
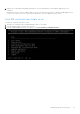
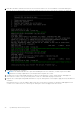
Table Of Contents
- OpenManage Network Integration for SmartFabric Services User Guide Release 2.1
- Contents
- About this guide
- Change history
- Overview of OMNI, SFS, VxRail, and PowerEdge MX
- OpenManage Network Integration
- OMNI vCenter integration
- Access the OMNI stand-alone portal
- Access the OMNI Fabric Management Portal
- OMNI Appliance Management user interface
- SmartFabric management with OMNI
- OMNI feature support matrix
- View SmartFabric instance overview
- View fabric topology
- Manage switches in a fabric
- SmartFabric bulk configuration
- Configure server interface profile
- Configure and manage uplinks
- Configure networks and routing configuration
- Configure global settings for SmartFabric
- View fabric events and compliance status
- OMNI automation support for PowerEdge MX SmartFabric
- OMNI automation support for NSX-T
- Lifecycle management
- Troubleshooting
- Troubleshooting tools
- Unable to add SmartFabric instance in OMNI
- Missing networks on server interfaces
- Unable to launch OMNI UI
- OMNI plug-in does not show service instance
- Unable to register the vCenter in OMNI
- OMNI is unable to communicate with other devices
- Timestamp not synchronized in OMNI
- Reset OMNI VM password

1. From the OMNI management menu, enter 4 to go to the Password/SSL configuration menu.
2. Enter 3 to generate self-signed SSL certificates. OMNI VM displays confirmation for
replacing the existing certificate and key with the newly created certificates and keys.
NOTE: If the OMNI stand-alone UI is open when generating a new self-signed SSL certificate, you must log out from
OMNI stand-alone UI and log in again before you unregister and re-register the vCenter.
3. Unregister the vCenter using OMNI stand-alone UI. After you unregister the vCenter, ensure that the OMNI plug-in is
removed from vCenter. If not, log out and log in the vCenter to confirm that the plug-in is removed.
38
OpenManage Network Integration