
Users Guide
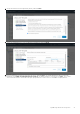
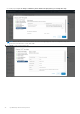
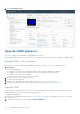
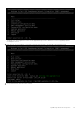
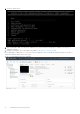
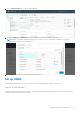
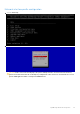
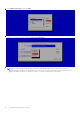
Table Of Contents
- OpenManage Network Integration for SmartFabric Services User Guide Release 2.0
- Change history
- Overview of OMNI, SFS, VxRail, and PowerEdge MX
- SmartFabric Services
- OpenManage Network Integration
- OMNI vCenter integration
- Access the OMNI stand-alone portal
- Access the OMNI Fabric Management Portal
- OMNI Appliance Management user interface
- OMNI automation support for PowerEdge MX SmartFabric
- OMNI automation support for NSX-T
- OMNI support for SmartFabric instances
- Lifecycle management
- Troubleshooting
- Logs and support data for troubleshooting
- Verify OMNI VM connectivity
- Unable to add SmartFabric instance in OMNI
- Missing networks on server interfaces
- Unable to launch OMNI UI
- OMNI plug-in does not show service instance
- Unable to register the vCenter in OMNI
- OMNI is unable to communicate with other devices
- Timestamp not synchronized in OMNI
- Reset OMNI VM password

2. Click the Edit Settings menu from the OMNI VM page.
3. Change the Memory and Hard disk 1 settings. Set Memory to 8 GB and Hard disk to 80 GB.
NOTE: When you upgrade OMNI VM using .ova file, you do not have to change these settings as it is installed
automatically with the above configurations.
4. Power On the OMNI VM after setting the required configurations.
Set up OMNI
This information describes how to log in to the VM console, and also explains the OMNI vCenter setup.
Log in to VM console
Configure OMNI through the VM console after completing the authentication step. By default, the VM console automatically
closes after 10 minutes, but can be customized.
OpenManage Network Integration
27