
Users Guide
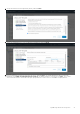
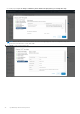
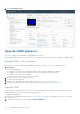
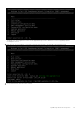
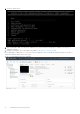
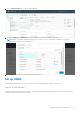
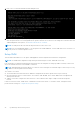
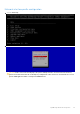
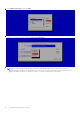
Table Of Contents
- OpenManage Network Integration for SmartFabric Services User Guide Release 2.0
- Change history
- Overview of OMNI, SFS, VxRail, and PowerEdge MX
- SmartFabric Services
- OpenManage Network Integration
- OMNI vCenter integration
- Access the OMNI stand-alone portal
- Access the OMNI Fabric Management Portal
- OMNI Appliance Management user interface
- OMNI automation support for PowerEdge MX SmartFabric
- OMNI automation support for NSX-T
- OMNI support for SmartFabric instances
- Lifecycle management
- Troubleshooting
- Logs and support data for troubleshooting
- Verify OMNI VM connectivity
- Unable to add SmartFabric instance in OMNI
- Missing networks on server interfaces
- Unable to launch OMNI UI
- OMNI plug-in does not show service instance
- Unable to register the vCenter in OMNI
- OMNI is unable to communicate with other devices
- Timestamp not synchronized in OMNI
- Reset OMNI VM password

3. Select Launch Web Console.
Upgrade OMNI appliance
This section explains how to upgrade the OMNI appliance in two ways.
When upgrading OMNI VM from 1.3 to 2.0 version, you can install the OMNI .ova file using new installation or upgrade OMNI.
Upgrade OMNI - new installation
Follow the below steps when upgrading OMNI appliance from older version (1.1 or 1.2) to 1.3 and later versions.
1. Prerequisite
Save the following details:
● IP address or hostname of the SmartFabric instances that are manually added in the OMNI VM.
● IP address or FQDN information of all the vCenters that are registered with the OMNI VM.
● IP address or hostname of the OMNI VM.
● Details of the ens192 and ens160 interface settings.
2. Unregister the vCenter from OMNI VM, see here.
3. Shut down the older OMNI VM.
4. Deploy the new OMNI VM using the latest OMNI OVA file, see Create OMNI virtual appliance.
5. Configure the OMNI VM with the documented settings and complete the full setup, see Set up OMNI.
Upgrade OMNI
You must be in the OMNI VM console to use these steps and only applies to the OMNI minor release upgrade. You can also
upgrade OMNI from 1.3 to 2.0 version using this upgrade workflow.
To upgrade OMNI appliance:
1. Download the OMNI upgrade image from the Dell EMC Support portal and store the image on an SCP server. Check the
existing version.
2. From the OMNI VM console, select the option 5. Upgrade Appliance.
24
OpenManage Network Integration