
Users Guide


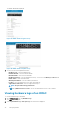
Table Of Contents
- Dell EMC OpenManage Mobile Version 3.3 User’s Guide (iOS)
- About OpenManage Mobile (OMM)
- Setting up OpenManage Mobile
- Managing OpenManage Essentials console
- Adding an OpenManage Essentials console
- Viewing OpenManage Essentials dashboard
- Editing connection details of an OpenManage Essentials console
- Deleting an OpenManage Essentials console
- Performing power control operations
- Performing power control operations on a server managed by OpenManage Essentials
- Managing OpenManage Enterprise
- Adding an OpenManage Enterprise console
- Viewing OpenManage Enterprise dashboard
- Editing connection details of an OpenManage Enterprise console
- Deleting an OpenManage Enterprise console
- Performing power control operations
- Performing power control operations on a server managed by OpenManage Enterprise
- Managing iDRAC
- Adding an iDRAC
- Viewing iDRAC dashboard
- Viewing hardware logs of an iDRAC
- Viewing firmware details of an iDRAC
- Viewing network details of an iDRAC
- Viewing health status of an iDRAC
- Viewing the warranty information of an iDRAC
- Accessing Dell Quick Resource Locator website through iDRAC
- Generating and Sharing the iDRAC Report
- Sharing iDRAC Details
- Viewing the remote desktop
- Editing connection details of an iDRAC
- Deleting an iDRAC
- RACADM Commands
- Device inventory
- Editing the BIOS configuration
- Viewing iDRAC details in web browser
- View certificate information of an iDRAC
- Performing power control operations on an iDRAC
- Activating or deactivating the system ID LED
- AutoConfiguration using XML configuration file
- Template deploy
- OpenManage Mobile Diagnostics using Quick Sync 2
- Managing an MX7000 chassis
- Monitor an MX7000 chassis by using Augmented Reality
- SupportAssist
- Inventory collection
- Push notifications
- Using the OpenManage Mobile Password
- Viewing OpenManage Mobile information
- Sharing feedback
- Troubleshooting OpenManage Mobile
- Unable to add OpenManage Essentials to OpenManage Mobile
- Unable to add OpenManage Enterprise to OpenManage Mobile
- Unable to add iDRAC to OpenManage Mobile
- Slow data retrieval
- Incomplete device information
- Unable to register for push notifications
- Unable to receive push notifications
- Delay in receiving push notifications
- Unable to retrieve iDRAC data
- VNC connection failed!
- BIOS attributes not shown in the manual configuration page
- Known issues
- Uninstalling OpenManage Mobile
- Related documents and resources
- Identifying the generation of your Dell EMC PowerEdge server
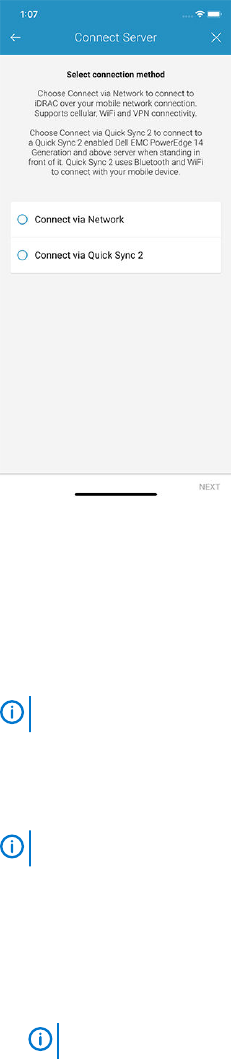
Figure 28. Quick Sync 2
2. Tap Server, and tap Next.
3. Tap Connect via Quick Sync 2, and tap Next.
A video on how to enable the bluetooth connection is displayed.
4. Tap Next.
You are prompted to enable access to the location and bluetooth.
5. Tap Allow.
NOTE:
Go to Settings to enable the bluetooth or location.
6. Select the appropriate server, and tap Next. You can use the Blink LED option to identify the chassis.
The certificate acceptance page is displayed.
7. Tap Yes to proceed.
The iDRAC authentication page is displayed.
NOTE:
To display the iDRAC authentication pop-up, ensure the Read Authentication option is enabled on the server.
8. You can authenticate the iDRAC in one of the following ways:
QR Scan:
a) On the credentials page, tap SCAN QR CODE.
The camera access permission message is displayed.
b) The credential is automatically populated. Tap Add Device.
Position the camera to scan the QRL.
NOTE:
To enter the credentials manually or by using QR Scan, enable Read authentication on the server.
Manual credentials:
a) Tap ENTER MANUALLY.
b) Enter the credentials to add the iDRAC.
c) Tap Submit .
The appropriate iDRAC server is added to the home page.
Viewing iDRAC dashboard
To view the iDRAC dashboard:
1. In the Inventory section of the OpenManage Mobile home page, perform one of the following:
• Tap Servers, and tap the appropriate iDRAC.
• Tap View All, and tap the appropriate iDRAC.
Managing iDRAC
35