
Users Guide


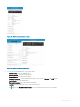

The Add server screen is displayed.
3 Tap Add via Quick Sync 2 and click Next.
A video on how to enable the bluetooth connection is displayed.
4 Click Next
The bluetooth permission pop up message is displayed.
5 Tap Allow.
NOTE: Go to Settings to enable the bluetooth.
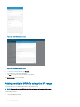
The BLE Device Scan screen is displayed.
6 Select the appropriate server and click next.
The certicate acceptance screen is displayed.
7 Tap Yes to proceed.
The iDRAC authentication screen is displayed.
NOTE: To display the iDRAC authentication pop up, ensure the Read Authentication option is enabled in the server.
8 You can authenticate the iDRAC in one of the following ways:
QR Scan:
a On the credentials page, Tap SCAN QR CODE.
The camera access permission pop up message is displayed.
b The credential is auto populated. Tap Add Device.
Position the camera to scan the QRL.
NOTE
: To enter the credentials manually or by using QR Scan, enable Read authentication on the server.
Manual credentials:
a Tap ENTER MANUALLY.
b Enter the credentials to add the iDRAC.
c Tap Submit .
The appropriate iDRAC server is added to the homepage.
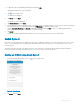
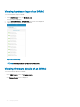
Viewing iDRAC dashboard
To view the iDRAC dashboard:
1 On the OpenManage Mobile home screen, tap the appropriate iDRAC console.
The iDRAC dashboard is displayed.
38
Managing iDRAC