Dell EMC OpenManage Mobile iOS Version 2.0.
Notes, cautions, and warnings NOTE: A NOTE indicates important information that helps you make better use of your product. CAUTION: A CAUTION indicates either potential damage to hardware or loss of data and tells you how to avoid the problem. WARNING: A WARNING indicates a potential for property damage, personal injury, or death. Copyright © 2017 Dell Inc. or its subsidiaries. All rights reserved. Dell, EMC, and other trademarks are trademarks of Dell Inc. or its subsidiaries.
Contents 1 About OpenManage Mobile............................................................................................................5 What is new in this release................................................................................................................................................... 5 2 Setting up OpenManage Mobile.....................................................................................................6 Installing OpenManage Mobile..............................
Device inventory..................................................................................................................................................................30 Editing the BIOS configuration.......................................................................................................................................... 30 Viewing iDRAC details in web browser ..........................................................................................................................
1 About OpenManage Mobile OpenManage Mobile is a systems management application that enables you to monitor your datacenter from an iOS mobile device. OpenManage Mobile enables you to add one or more OpenManage Essentials consoles and/or Integrated Dell Remote Access Controllers (iDRACs) 7 or later. OpenManage Mobile provides OpenManage Essentials alerts to your mobile device and enables you to troubleshoot your hardware in case of emergencies.
2 Setting up OpenManage Mobile This chapter provides information about installing and starting OpenManage Mobile. Topics: • • • • • • Installing OpenManage Mobile Starting OpenManage Mobile Viewing OpenManage Mobile home screen Demo Mode Configuring analytics settings Resetting OpenManage Mobile Installing OpenManage Mobile Prerequisites to install OpenManage Mobile: • • Ensure that you have iOS version 9 or later on your mobile device.
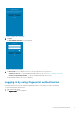
Figure 1. Diagnostics and Usage 3. Tap Agree. The PASSWORD SETTINGS screen is displayed. Figure 2. Password settings 4. The Demo Mode screen is displayed.Tap one of the following based on your preference: • • Try Demo mode now: To open OpenManage Mobile in demo mode, see Enabling or Disabling Demo Mode. Continue to OpenManage Mobile: To open the OpenManage Mobile home screen. The OpenManage Mobile home screen is displayed.
Figure 3. Login to OMM 2. Swipe your registered fingerprint on the fingerprint sensor. If the authentication is successful, the Fingerprint recognised message is displayed. The OpenManage Mobile home screen is displayed. Viewing OpenManage Mobile home screen To view the OpenManage Mobile home screen: 1. Start OpenManage Mobile. 2. If applicable, enter the OpenManage Mobile password and tap Login. The OpenManage Mobile home screen is displayed.
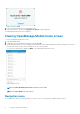
Figure 5. Navigation menu • • • • • • • Configure Servers — Allows you to deploy and manage server configurations using OpenManage Mobile. Task Manager — Allows you to view the actions performed in OpenManage Mobile. App Log — Displays the application log severity and details. Password Inventory — Extract the service tag, MAC address, and password details using the QR code available on the server. Settings — Navigates to the Settings screen.
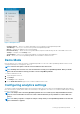
To configure the analytics settings: 1. Tap . 2. Tap Settings. The Settings screen is displayed. 3. Use the Share Anonymous Data toggle switch to enable or disable sharing Analytics Data Collection. Resetting OpenManage Mobile This feature allows you to reset OpenManage Mobile to original settings and start a new session. You can use the reset option if the OpenManage Mobile password is not retrievable.
3 Managing OpenManage Essentials console This section provides information you require to add, edit, or delete an OpenManage Essentials console in OpenManage Mobile.
Figure 7. Adding OME (tablet view) 5. To save the connection details, tap Add. The OpenManage Essentials SSL certificate is displayed. 6. Tap Yes to accept the certificate and save the OpenManage Essentials console. 7. On the Set Alert Subscription screen, select the appropriate alert filter for push notifications and tap Save. NOTE: To set a custom alert filter, see OpenManage Essentials User’s Guide.
Figure 8. OME dashboard • indicates the number of devices or alerts that are critical. • indicates the number of devices or alerts that are with warning status. • indicates the number of devices or alerts that are healthy. • indicates the number of devices or alerts that are unknown. • indicates the available information about the devices or alerts. 2. Tap Devices by health to view the devices managed by OpenManage Essentials and tap Alerts by severity to view the alerts.
Figure 9. All devices 3. Tap the appropriate device category and then tap to select the device you want to view. Figure 10. Device details The inventory information of the devices managed by OpenManage Essentials is displayed. 4.
The Hardware log screen is displayed. Viewing the warranty information To view the warranty information: • On the Device Details screen, tap Warranty Information. The Warranty screen is displayed. NOTE: An internet connection is required to view the warranty information. Accessing Dell Quick Resource Locator website through OME To access the Dell QRL website: • On the Device Details screen, tap Support. The Dell Quick Resource Locator website is displayed in a new web browser.
Figure 12. Alerts and Alerts Details (tablet view) You can forward, acknowledge, or delete an alert. NOTE: Alerts can be filtered using Filter option. Performing an action on multiple alerts To Perform an action on multiple alerts: 1. On the OME Console screen, tap Alerts by severity. The Alerts screen is displayed. 2. Tap Edit 3.
2. Select the option you want to use to share the alert details. Figure 13. Alert sharing options Deleting an alert To delete an alert: 1. On the Alert Details screen, select the alerts you want to delete and tap Delete to delete an alert. Figure 14. Deleting alerts 2. In the Delete Confirmation box, tap Delete Alert to confirm. The alert is deleted, and you are returned to the Alerts list screen.
Editing connection details of an OpenManage Essentials console To edit the connection details of the OpenManage Essentials console: 1. On the OpenManage Mobile home screen, perform the following steps: • Tap the OpenManage Essentials console you want to edit. The OpenManage Essentials dashboard is displayed. a. Tap . b. Tap Edit Connection. The Edit Connection screen is displayed. 2. Edit the IP/hostname, Domain (if applicable), Username, Password, and Description (optional) as required. 3. Tap Update.
To perform a power control operation: 1. On the OpenManage Mobile home screen, tap the appropriate OpenManage Essentials console. 2. In the OpenManage Essentials dashboard, tap Devices by health. The All Devices screen is displayed. 3. Tap the appropriate device category (for example, RAC), and then tap to select the device you want to perform power control operation on. The Device Details screen is displayed. 4. Tap and select Power Options. The supported power control operations are displayed. Figure 15.
1. From the Home screen, tap the appropriate server. 2. Tap Options. 3. Tap Run RACADM command. The RACADM commands screen is displayed. 4. Tap one of the following commands mentioned below: • • • • • • • System Information Hardware Inventory Hardware Inventory License Information Software Inventory Job Information Custom Command - You can manually type a RACADM command to perform any server operation. The available report is displayed. Figure 16.
• • • Enable Once Enable Once After Reset Disabled 6. Tap Next. The configuration is saved and the status can be viewed in the Task Manager.
4 Managing iDRAC This section provides information you require to add, edit, or delete an iDRAC in OpenManage Mobile.
Figure 17. Add iDRAC (phone view) Figure 18. Add iDRAC (tablet view) 6. To save the connection details, tap Add. The iDRAC SSL certificate is displayed. 7. Tap Yes to accept the certificate and save the iDRAC. The iDRAC Details screen is displayed. Adding multiple iDRACs using the IP range This feature allows you to add multiple iDRACs using iDRAC range.
NOTE: You can add multiple iDRACs only if the username and password is the same. To add multiple iDRACs: 1. Start OpenManage Mobile. 2. If applicable, type the OpenManage Mobile password and tap Login . OpenManage Mobile home screen is displayed. 3. Tap next to the server section. The Connection Method pop up window is displayed. 4. Type the start and end range of the iDRACs in the last octet separated by a dash in the IP/Hostname. For example 192.168.0.
NOTE: Go to Settings to enable the bluetooth. The BLE Device Scan screen is displayed. 6. Select the appropriate server and click next. The certificate acceptance screen is displayed. 7. Tap Yes to proceed. The iDRAC authentication screen is displayed. NOTE: To display the iDRAC authentication pop up, ensure the Read Authentication option is enabled in the server. 8. You can authenticate the iDRAC in one of the following ways: QR Scan: a) On the credentials page, Tap SCAN QR CODE.
Figure 21. iDRAC dashboard (tablet view) 2. You can view the detail and status of the options below • • • • • • • • Hardware Log- View the hardware logs. Firmware Details- View the firmware details. Network Details- View the network details. Hardware Inventory- View the Hardware Inventory. You can view the Memory and CPU details. Health Status- View the health status. Warranty Information- View the warranty information. Location Details- View the Data Center, Room, Aisle, Rack, and Slot.
Figure 22. Hardware logs NOTE: Retrieving hardware logs may take a few minutes. Viewing firmware details of an iDRAC To view the firmware details of an iDRAC: • In the iDRAC Details screen, tap Firmware Details. The Firmware Details screen is displayed. Figure 23. Firmware details Viewing network details of an iDRAC To view the network details of an iDRAC: In the iDRAC Details screen, tap Network Details. The Network Details screen is displayed.
Figure 24. Network details Viewing health status of an iDRAC To view the health status of an iDRAC: • In the iDRAC Details screen, tap Health Status. The Health Status screen is displayed with the Temperature and Power values. Figure 25. Health status Viewing the warranty information of an iDRAC To view the warranty information of an iDRAC: • In the iDRAC Details screen, tap Warranty Information. The warranty information of the server is displayed.
Accessing Dell Quick Resource Locator website through iDRAC To access the Dell Quick Resource Locator website: • In the iDRAC Details screen, tap Support. The Dell Quick Resource Locator website is displayed in a new web browser. NOTE: An internet connection is required to access the Dell Quick Resource Locator website. Generating and Sharing the iDRAC Report To generate the iDRAC report: 1. On the OpenManage Mobile home screen, tap the appropriate iDRAC console. The iDRAC dashboard is displayed. 2.
• Tap the iDRAC you want to remove. The iDRAC Details screen is displayed. a. Tap . b. Tap Edit Connection. c. Tap Delete Device. The Delete Confirmation message is displayed. 2. Tap Delete Device. The iDRAC is deleted from OpenManage Mobile. Device inventory You can view the following device inventory information of a server (iDRAC connection) or an OpenManage Essentials — managed device. Table 1.
2. Tap Launch iDRAC GUI. 3. The iDRAC details will be displayed in the device browser. Performing power control operations on an iDRAC To perform power control operations on an iDRAC: 1. On the OpenManage Mobile home screen, tap the appropriate iDRAC server. 2. Tap . The iDRAC Settings menu is displayed. 3. Tap Power Options. The supported power control operations are displayed. 4. Select the power control operation you want to perform, and tap Submit.
Figure 27. Blink LED options (tablet view) Template deploy You can perform the initial server deployment using OpenManage Mobile. You can edit and save the server configurations mentioned below: • • • • • • • IPV4 Settings IPV6 Settings NIC Configuration BIOS Configuration Root Configuration Location Information First Boot device • • Creating a Template Deploying a template Figure 28.
Creating a Deployment template NOTE: Template deploy is available only for 14G servers. To create a deployment template in OpenManage Mobile 1. Tap . 2. Tap Configure servers. 3. Tap Manage Templates. 4. Tap Add. The Template Configuration screen is displayed. Figure 29. Template Configuration 5. Enter the appropriate configuration and Tap Save. The created template is displayed on the Manage Templates screen.
OpenManage Mobile Diagnostics using Quick Sync 2 OpenManage Mobile allows technicians to perform additional at-the-box troubleshooting using Quick Sync 2.OpenManage Mobile allows the technician to download Tech Support Reports (TSR), Screen shots, and, Crash Screen Videos to diagnose and identify the point of failure. These actions are enabled in the OpenManage servers and accessed remotely using WS-MAN. Diagnostics using Quick Sync 2 Ensure the device is connected to the server.
5 Inventory collection The OpenManage mobile Inventory collection feature allows you to scan QR codes to save the systems service tag and MAC address. This inventory can be exported as a XML file. Topics: • • To add a service tag To share the service tag information To add a service tag Ensure that you have pulled out the tag with the QR code information available on the server. 1. Tap . 2. Tap Password Inventory. 3. Tap . The camera permission pop up message is displayed. 4. Tap Allow.
6 Push notifications Push notifications enable OpenManage Mobile to notify you when a subscribed OpenManage Essentials console receives alerts from a monitored device or when a task is complete in OpenManage Essentials. The notification appears in the status bar of your mobile device, similar to notifications that are displayed for messages, downloads, and so on. OpenManage Mobile allows you to configure the type of push notification you want to receive.
7 Using the OpenManage Mobile Password To ensure OpenManage Mobile is secure, you can set a password. You can enable password authentication using the Enable Password option in Settings. • • If a password is set and you do not use the device for more than 15 minutes, OpenManage Mobile is automatically locked, and then the login page of OpenManage Mobile is displayed.
Figure 32. Change password (tablet view) 3. Type the current OpenManage Mobile password, new password, reconfirm the new password. 4. Tap Save. Disabling the OpenManage Mobile password To disable the OpenManage Mobile password: 1. On the OpenManage Mobile home screen, tap the overflow menu. 2. In the menu that is displayed, tap Settings. The Settings screen is displayed. Figure 33. Settings 3. Clear the Enable Password option.
8 Viewing OpenManage Mobile information This section provides information about viewing the OpenManage Mobile log, Version, End User License Agreement (EULA), OMM Dell Tech Center, Manuals and Documentation, Contact Dell.
1. On the Home screen, tap . 2. Tap About. The OpenManage Mobile product information is displayed. 3. Tap Manuals and Documentation. The OpenManage Mobile Manuals and Documentation is displayed. Viewing the OpenManage Mobile End User License Agreement and Open source licence To view the OpenManage Mobile EULA that was displayed during the installation: 1. On the Home screen, tap . 2. Tap About. The OpenManage Mobile product information is displayed. 3. Tap View EULA.
9 Sharing feedback You can share your feedback to Dell about OpenManage Mobile. To share your feedback: 1. Start OpenManage Mobile and tap . 2. Tap Send Feedback. The default email application is displayed. 3. Enter your feedback and send the email. You can also email your feedback to om_mobile_feedback@dell.com.
10 Troubleshooting OpenManage Mobile Unable to add OpenManage Essentials to OpenManage Mobile If you are unable to add an OpenManage Essentials to OpenManage Mobile, you can try the following workarounds: Workarounds: • • • Verify network configuration: To add an OpenManage Essentials server to OpenManage Mobile, OpenManage Essentials must be available on the specified web port (default 2607) and not stopped by any firewall or other security mechanism.
• Incomplete information for devices managed by OpenManage Essentials. Workaround: Make sure that data is correctly inventoried in OpenManage Essentials. For more information, see OpenManage Essentials User’s Guide. Unable to register for push notifications Unable to register for push notifications. Workaround: To register for push notifications from an OpenManage Essentials, perform the following steps: 1. 2. 3. 4. Tap . Tap Settings. Tap Notifications.
Known issues • • OpenManage Mobile fails to connect using Quick Sync 2 wirelessly, if the device wifi frequency is set to 5.0 GHz. iDRAC supports only 2.4 GHz frequency band for direct wifi. OpenManage Mobile does not provide the appropriate output logs for the following RACADM commands: 1. 2. 3. 4. 5. storage get controllers -o storage get enclosures -o raid get controller raid get pdisks -o lclog • • A message Command Succesful is displayed, which is not the expected output.
11 Uninstalling OpenManage Mobile To uninstall OpenManage Mobile: 1. Tap . 2. Tap Settings. 3. Tap General. 4. In the Storage and iCloud Usage, tap Manage Storage. 5. Tap OMM application. 6. Tap Delete. Tap Yes to complete the uninstallation. 7. At the Do you want to uninstall this app? prompt, tap OK.
12 Related documents and resources Other documents you may need Besides this you can find the following documents on the Dell EMC OpenManage Mobile Support website at delltechcenter.com/omm • • Dell EMC OpenManage Essentials version 2.0 User’s Guide. Integrated Dell Remote Access Controller 9 User’s Guide.
• Serviceability Tools • Support • Utilities • Virtualization Solutions 4. To view a document, click the required product and then click the required version. • Using search engines: • Type the name and version of the document in the search box.