
Users Guide

3. Tap Add via Quick Sync 2 and click Next.
A video on how to enable the bluetooth connection is displayed.
4. Click Next
The bluetooth permission pop up message is displayed.
5. Tap Allow.
NOTE: Go to Settings to enable the bluetooth.
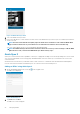
The BLE Device Scan screen is displayed.
6. Select the appropriate server and click next.
The certificate acceptance screen is displayed.
7. Tap Yes to proceed.
The iDRAC authentication screen is displayed.
NOTE: To display the iDRAC authentication pop up, ensure the Read Authentication option is enabled in the server.
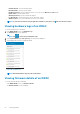
8. You can authenticate the iDRAC in one of the following ways:
QR Scan:
a) On the credentials page, Tap SCAN QR CODE.
The camera access permission pop up message is displayed.
b) The credential is auto populated. Tap Add Device.
Position the camera to scan the QRL.
NOTE: To enter the credentials manually or by using QR Scan, enable Read authentication on the server.
Manual credentials:
a) Tap ENTER MANUALLY.
b) Enter the credentials to add the iDRAC.
c) Tap Add iDRAC.
The appropriate iDRAC server is added to the homepage.
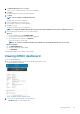
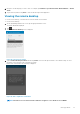
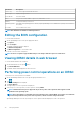
Viewing iDRAC dashboard
To view the iDRAC dashboard:
1. On the OpenManage Mobile home screen, tap the appropriate iDRAC console.
The iDRAC dashboard is displayed.
Figure 19. iDRAC dashboard (phone view)
2. You can view the detail and status of the options below
• Hardware Logs- View the hardware logs.
Managing iDRAC
23