
Users Guide


Creating a Domain Service Account
A domain service account is required to run SQL Server on the domain controller.
To create a domain service account:
1. Click Start → Administrative Tools.
2. Select Active Directory Users and Computers.
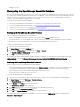
3. On the left pane, right-click Managed Service Account → New → User.
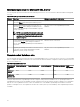
The New Object – User window is displayed.
4. Type the rst name and user logon name in the appropriate elds, and click Next.
5. Type a password and reconrm the password in the appropriate elds, and click Finish.
Conguring the database instance
The SQL Server service will not start if you are using the default NETWORK SERVICE or LOCAL SYSTEM accounts. Therefore, you
must congure the SQLEXPRESSOME database instance to run using a domain service account.
To congure the SQLEXPRESSOME database instance:
1. Open Microsoft SQL Server Conguration Manager.
2. On the left pane, click SQL Server Services.
3. On the right-pane, right-click SQL Server (SQLEXPRESSOME) and click Properties.
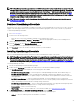
The SQL Server (SQLEXPRESSOME) Properties window is displayed.
4. In the Log on tab, select This account.
5. Type the domain service account name, password, and conrm the password in the appropriate elds.
6. Click Restart.
7. Click Apply
Adding users to the OpenManage Essentials user groups
To add users to the OpenManage Essentials user groups:
NOTE: The users you add to the OpenManage Essentials user group must also belong to the built-in local Administrator
group. For information on adding a Windows user account to a group, see
Adding a user account to a group
at
support.microsoft.com
1. Open Server Manager.
2. Click Tools → Computer Management.
3. In the left pane, click Local Users and Groups → Groups.
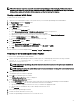
4. In the right-pane, right-click OmeAdministrators and select Add to Group.
5. In the OmeAdministrator Properties window, click Add.
The Select Users window is displayed.
6. In the Enter the object names to select eld, type the user name.
7. Click Check Names and then click OK.
The user name is displayed in the Members list within the OmeAdministrator Properties window.
8. Click OK.
Enabling SQL Server and Windows Authentication Mode in SQL Server
To enable SQL Server and Windows authentication mode:
1. Open SQL Server Management Studio.
2. In Obejct Explorer, right-click the top-level SQL Server object and click Properties.
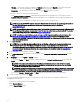
The Server Properties window is displayed.
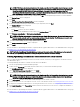
3. In the left pane, click Security.
4. In the right pane, under Server authentication, click SQL Server and Windows Authentication mode.
30