
Users Guide
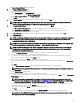

• The compute pool contains a minimum of two servers, one or both of the servers in a deployed state.
• The source server is deployed within the same compute pool.
• The target server is within the same compute pool as the source server.
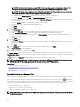
To replace a server:
CAUTION: The replace server task may result in potentially destructive changes to the device conguration including
performance, connectivity, ability to boot the device, and/or data loss.
1. Click Deployment.
The Deployment Portal is displayed.
2. Perform one of the following:
• In the Common Tasks pane, click Replace Server.
• In the Compute Pools pane, right-click the compute pool that includes the server you want to replace, and then click
Replace Server.
The Replace Server Wizard wizard is displayed.
3. On the Name page, type an appropriate name for the task, and then click Next.
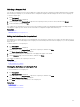
4. On the Source and Target page:
NOTE: The target servers are displayed only after you select the source server. The servers displayed in the Select
Target section also include servers that are already in a deployed state.
a. Under Select Source, select the source server.
b. Under Select Target, select the target server.
c. Click Next.
5. On the Review Source Attributes page, review the template attributes, IOA VLAN attributes (if applicable), device specic
attributes, and virtual I/O identity assignments, and then click Next.
6. On the Options page, select any of the following options based on your preference:
• Remove source from compute pool — Select to move the source server from the compute pool to the Repurpose and
Bare Metal Devices group after the server is replaced.
• Deploy to target even if virtual identities cannot be reclaimed from the source — Select to reclaim the virtual I/O
identities of the source server, even if the source server is unreachable.
7. Click Next.
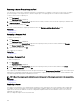
8. On the Credentials page, type the iDRAC user name and password of the source server and target server in the appropriate
elds, and then click Next.
9. On the Summary page, review the selections you have made, and then click Finish.
The Replace Server warning is displayed.
10. If you want to continue the replacement, click Yes.
The replace server task is created and the task runs immediately. You can double-click the task in Task Execution History to view
the task execution details. After the deployment is completed successfully, the template deployed icon and the text, Deployed,
are displayed along with the device name in the compute pool.
NOTE: When a server is replaced, all selected attributes of the device conguration template (including device-specic
identity attributes for workload movement) are deployed on the target server. If you try to redeploy the device
conguration template after replacing the server, the device-specic attributes are not populated automatically in the
Deploy Template wizard. Therefore, if required, you must manually enter the device-specic attributes in the Edit
Template page of the Deploy Template wizard.
NOTE: When the replace server task runs, the pie chart in the Device Compliance portal displays the source server as
two devices — one as Not Compliant or Compliant and another as Not Inventoried. After the server replacement task is
completed, the pie chart displays the correct compliance status for the source server.
159