
Users Guide

Editing a device deployment template
You can edit a device deployment template to change the values of the attributes before you deploy on the target devices.
NOTE: Editing of an IOA template is not supported.
To edit a device deployment template:
1.
Click Deployment → Deployment Portal.
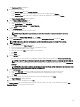
2. In the Templates pane, right-click a template, and then click Edit.
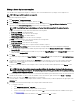
3. The boot congurations and the network interface settings are displayed in the Boot and Network Conguration tab in the
right pane. Under First Boot Conguration, select the boot mode and the boot type.
NOTE: The default boot type is selected based on the boot type that is specied in the captured template.
If FC is selected as the boot type, then enter details in the following elds:
a. First Target WWPN—the WWPN address
b. First Target LUN Id—the LUN ID for the rst target
c. Second Target WWPN—the WWPN address
d. Second Target LUN Id—the LUN ID for the second target.
If FCoE is selected as the Boot Type, then enter details in the following elds:
a. First Target WWPN—the WWPN address
b. First Target LUN Id—the LUN ID for the rst target
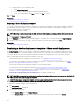
4. Click More Settings to change the boot sequence and the hard drive sequence.
5. Under Network Interface Settings, all the network interfaces settings available in the selected template are displayed.
a. If the partitioning is supported, then enable the partitioning and provide the Minimum Bandwidth (%) and Maximum
Bandwidth (%).
b. For the templates captured from the modular servers, provide the Tagged VLAN(s) and the Untagged VLAN values for the
IOA ports under Integrated NIC.
6. Click Save.
The values that are provided in the Tagged VLAN(s) and the Untagged VLAN elds are displayed in the IOA VLAN Attributes
tab.
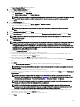
7. The attributes of the template are displayed in the Attributes tab in the right pane. If you do not want to deploy a particular
attribute in the template and want to retain the current attribute value on the target device, clear the check box for that
attribute in the
Deploy column.
8. To select or clear all the attributes in the template, select or clear the check box that is displayed next to the Deploy column
title.
NOTE: If the value of an attribute depends on another attribute, the dependency is indicated in the Dependencies
column of the conguration template. To deploy the dependent attributes, you must rst edit the primary attributes,
and then edit the dependent attribute.
9. To select multiple rows of attributes, select the row that has the rst attribute, press and hold the <Shift> key, and click the row
that has the last attribute. To select or clear the attributes of the selected rows, right-click and select
Check or Uncheck.
10. Edit or select the values in the Value column based on your preference.
The total number of attributes in the template and the number of attributes that you edit are displayed in the upper right of the
Attributes tab.
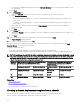
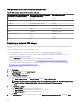
11. To congure network and VLAN settings for the compute sleds in a MX7000 chassis:
a. To congure a network:
1. Click MX Chassis Networks → Add New.
2. Enter a name, description, and a valid VLAN ID for the network.
3. Select a network type from the drop-down list and click Ok. For more information about the available network types,
see Network Types.
4. To save the congured network attributes, click Save, and then click Yes to conrm.
131