
Users Guide


3. In the Address eld, type the location name or airport code. For example, New York.
NOTE: Using the Address eld to move a device location requires an Internet lookup through the map provider to
resolve the provided address. The device is moved to the most appropriate location available from the Internet
lookup. If the map provider is not able to resolve the address, a message is displayed, and the device remains at the
current location.
4. Click Save.
If the map provider is able to resolve the address or airport code, the pin is moved to the specied location on the map.
Related links
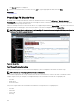
Using Map View
Moving a Device Location Using the Search Pin
Importing Licensed Devices
NOTE: Only PowerEdge VRTX and PowerEdge FX2/FX2s devices with an Enterprise license that are not already placed
on the map can be imported to the map.
NOTE: Only OpenManage Essentials Administrators and Power Users are permitted to import licensed devices.
NOTE: You can only import a maximum of up to 500 devices at a time.
You can bulk import licensed devices on the map through a .csv le. An Export Template function is available, which creates a .csv
le that is already populated with the names of the licensed PowerEdge VRTX and PowerEdge FX2/FX2s devices that are currently
discovered.
To import licensed devices:
1. Perform one of the following:
• Click Home → Map View.
• Click Manage → Devices → Map View.
2. On the Map View, do one of the following:
• Right-click the map, and click Import Licensed Devices.
• Move the mouse pointer over the Actions menu, and click Import Licensed Devices.
The Import Licensed Devices dialog box is displayed.
3. Click Export Template to download a .csv template that you can use for importing licensed PowerEdge VRTX devices.
NOTE: For more information about the template, see Template for Importing Devices.
The Save As dialog box is displayed.
4. Browse to the location where you want to save the .csv le, type an appropriate le name, and click Save.
5. Open the .csv le, and perform one of the following:
• In the Latitude and Longitude columns, type the latitude and longitude coordinates for each device.
• In the Address column, type the address for each device. For example, 1 dell way, round rock, TX.
NOTE: Before you import devices using the address, ensure that the system is connected to the Internet. If the
system connects to the Internet through a proxy server, verify if the proxy settings are congured in the Settings
→ General Settings page. Also, the Internet search provider may reject the address search request if you are
attempting to import too many devices at a time. If this occurs, wait for some time and try importing again.
6. Click Import.
The Open dialog box is displayed.
7. Select the location where the updated .csv le is located, and click Open.
The Import Summary dialog box is displayed.
8. Click Ok.
102