
Users Guide


Conguring Alert Actions
Alert actions occur on all alerts received by the OpenManage Essentials console. The alert is received and processed by the
OpenManage Essentials console whether or not OpenManage Essentials has discovered the device so long as OpenManage
Essentials is listed in the device's SNMP trap forward destinations list. To prevent this, remove OpenManage Essentials from the
SNMP trap forward destinations list on the device.
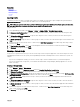
Setting Up E-mail Notication
You can create e-mail notications when an alert is received. For example, an e-mail is sent if a critical temperature alert is received
from a server.
To congure an e-mail notication when alerts are received:
1. Select Manage → Alerts → Common Tasks → New Alert Email Action.
2. In Name and Description, provide e-mail alert action name and description and then click Next.
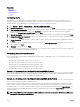
3. In E-mail Conguration, do the following and then click Next.
a. Provide e-mail information for the To: and From: recipients and provide the substitution information. Separate each recipient
or distribution list with a semi-colon.
b. Customize the e-mail message format with any of the following substitution parameters:
• $n = Device
• $ip = Device IP
• $m = Message
• $d = Date
• $t = Time
• $sev = Severity
• $st = Service Tag
• $r = Recommended Resolution
• $e = Enterprise OID
• $sp = Specic Trap OID
• $g = Generic Trap OID
• $cn = Alert Category Name
• $sn = Alert Source Name
• $pkn = Package Name
• $at = Asset Tag
• $loc = Device Location
• $mod = Model Name
c. Click Email Settings and provide SMTP server name or IP Address, to test e-mail settings and click OK.
d. Click Test Action to send test e-mail.
4. In Severity Association, assign the alert severity to which you want to associate this e-mail alert and then click Next.
5. In Categories and Sources Association, assign the alert categories or alert sources to which you want to associate this e-mail
alert and then click Next.
6. In Device Association, assign the device or device groups to which you want to associate this e-mail alert and then click Next.
7. By default the Email Notication is always active. To limit activity, in Date Time Association, enter a date range, time range, or
days, and then click Next.
8. In Summary, review the inputs and click Finish.
246