
Users Guide


The Deploy Template Wizard wizard is displayed.
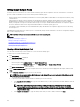
3. On the Name and Deploy Options page:
a. Type an appropriate name for the task.
b. Under Deploy Target, select Compute Pool.
c. Select a compute pool from the Select a Compute Pool list.
d. Under Select Deploy Options, select Deploy Template.
e. Click Next.
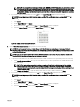
4. On the Select Template page, select a device conguration template and click Next.
NOTE: Only device conguration templates that you have either created or cloned are available for selection. A
template that is already assigned to a compute pool is not available for selection.
5. On the Select Virtual I/O Pool page, perform one of the following, and then click Next.
• Select User dened I/O assignment if you want to manually provide virtual I/O identities for the devices.
• Select Automatic I/O assignment and select a virtual I/O pool from the list to allow OpenManage Essentials to
automatically assign virtual I/O identities to the devices.
6. On the Select Devices page, select one or more target devices from the compute pool tree, and then click Next.
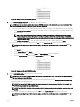
7. On the Edit Attributes page:
NOTE: OpenManage Essentials does not include any passwords from the source when the conguration template is
created. If you want to set the passwords for the target devices, all password attributes must be edited in the
conguration template before deployment.
NOTE: If you selected User dened I/O assignment in step 5, you must edit the I/O attributes of the template and
provide the appropriate values in the Edit Attributes → Device Specic Attributes tab.
NOTE: The BIOS attributes list of the device conguration template contains the BIOS.Virtual instance with the
following attributes: EnableBootDevices and DisableBootDevices. Devices that you want to boot from must be
included in the EnableBootDevices list.
a. Click the Template Attributes tab to edit the attributes of the device conguration template.
b. Click the attribute group name to view the list of attributes in a group.
c. If you do not want to deploy a particular attribute in the template and want to retain the current attribute value on the
target devices, clear the check box in the Deploy column.
d. Edit or select the values in the Value column based on your preference.
The total number of attributes in the template and the number of attributes that you edit are displayed on the Grouped by
bar.
e. Click Save.
f. Click the Device Specic Attributes tab to edit the attributes that are unique for the target devices.
NOTE: The Device Specic Attributes tab may or may not display attributes based on the template selected for
deployment.
g. Under Select Devices, select a device.
h. Click the attribute group name to view the list of attributes in a group.
i. To assign a new Static IPv4 Address for the deployment, enter the Static IPv4 Address in the Value column of IPv4Static 1
IPv4 Address attribute.
NOTE: Deploying the template with the changed Static IPv4 Address initiates a new discovery task for the
device. For more information on the task details, see Task Status. The new Static IPv4 Address is added to the
discovery range under Manage → Discovery and Inventory → Discovery Ranges → All Ranges.
j. If you do not want to deploy a particular attribute in the template and want to retain the current attribute value on the
target device, clear the check box in the Deploy column.
k. Edit or select the values in the Value column based on your preference.
l. Click Save.
m. (For automatic virtual I/O assignment only) Click the Identity Attributes tab to assign the virtual I/O identities.
NOTE: For FCoE WWPN, WWNN, and virtual FIP attributes, if you deselect an attribute, all the other related
attributes are deselected automatically.
149