
Users Guide

1. Click Import.
2. On the Import Wizard, click Import.
3. Browse and select the .csv le and click Open. The Import Results window is displayed.
4. Close the Import Results window and the Import Wizard, and then click Next.
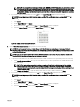
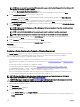
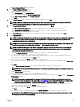
Figure 26. Sample .csv le with iSCSI IQN identities
8. On the Summary page, review the denitions with the number of identities that you provided for the I/O identity types, and
then click Finish.
The virtual I/O pool that you created is displayed under Virtual I/O Pools on the left pane.
Related link
Virtual Input-Output Pools
Create Virtual Input-Output Pool Wizard
Editing a Virtual Input-Output Pool
You can edit a virtual I/O pool to add ranges that you had not specied earlier, add a new I/O identity type, or delete identity type
ranges that have not been assigned to any compute pool.
To edit the denitions of a virtual I/O pool:
1. Click Deployment.
The Deployment Portal is displayed.
2. On the left pane, under Virtual I/O Pools, right-click a virtual I/O pool, and then click Edit.
The Create Virtual I/O Pool Wizard is displayed.
3. Make the required changes to the denitions on the appropriate pages of the wizard.
4. On the Summary page, click Finish.
The changes you made to the virtual I/O pool are saved.
Related link
Virtual Input-Output Pools
Create Virtual Input-Output Pool Wizard
Viewing the Denitions of a Virtual Input-Output Pool
To view the denitions of a virtual I/O pool:
1. Click Deployment.
The Deployment Portal is displayed.
2. On the left pane, under Virtual I/O Pools, right-click a virtual I/O pool, and then click View.
The Create Virtual I/O Pool Wizard is displayed.
3. Click Next to view the various I/O identity denitions of the virtual I/O pool.
Related link
Virtual Input-Output Pools
Create Virtual Input-Output Pool Wizard
145