
Users Guide


3. The Bandwidth section displays the following bandwidth settings of the partitioned NICs: NIC identifier, Port, Partition, Min
Bandwidth (%), and Max Bandwidth (%). Click Next
4. The VLANs section displays the following VLAN details of the profiles: NIC teaming, NIC identifier, Port, Team, Untagged Network,
and Tagged Network.
5. Click Finish to close the View Network wizard.
Edit a profile
An existing profile can be edited on the Configurations > Profiles page. The changes in the profile do not affect the associated target
system automatically. For the changes to take effect, the modified profile must be redeployed on the target device.
NOTE: Only users with OpenManage Enterprise Administrator privileges are allowed to perform these tasks.
To rename, edit network, or edit the attributes of an existing profile, select the profile on the Profiles page and click Edit. The following
edit options can be selected:
1. Select Rename and in the Rename Profile wizard edit the profile name in the Name box.
2. Select Edit Profile to activate the Edit Profile wizard and edit the following:
a. On the Details page, you can edit the Name and Description. Click Next.
b. On the Boot to Network ISO page, select the Boot to Network ISO check box to specify the full ISO path and the share location
and do the following:
• Select Share Type as either CIFS or NFS.
• In the ISO Path box, enter the full ISO path.
• Provide details in the Share IP Address, Username, and Password boxes.
• Select the Time to Attach ISO dropdown menu options to set the number of hours the network ISO file will remain mapped
to the target device. By default, this value is set as four hours.
• Click Next.
c. On the iDRAC Management IP page, select from one of the following :
• Don't change IP settings.
• Set as DHCP
• Set static IP and provide the relevant Management IP, Subnet Mask, and Gateway details.
d. On the Target Attributes page, you can select and edit the BIOS, System, NIC, iDRAC, and virtual identity attributes of the
profile.
e. Click Finish to save the changes.
Assign a Profile
From the Configuration > Profiles page, an unassigned profile can be either deployed on an existing server or can be reserved for auto
deployment on a yet-to-be discovered server.
NOTE:
• Only OpenManage Enterprise users with Administrator or Device Manager privileges can perform this task.
• The existing attributes, if any, of the target server would be overwritten when a profile is deployed on it.
• Only the devices that are not associated with any profiles are available for deployment or auto deployment.
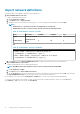
1. To Deploy a profile:
a. Select an unassigned profile on the Configuration > Profiles page, click Assign > Deploy to activate the Deploy Profile wizard.
b. The Details page displays the source template, profile name and description. Click Next.
c. On the Target page:
• Click Select and from the list of devices, select a target device.
• If a reboot is required after the deployment, select the Do not forcefully reboot the host OS if the graceful reboot fails
check box.
• Click Next.
d. (Optional) On the Boot to Network ISO page, select the Boot to Network ISO check box and provide the relevant ISO path,
share location details, and the Time to Attach ISO value. Click Next.
e. On the iDRAC Management IP page, select from one of the following options and provide further relevant details.
Manage Profiles
77