
Users Guide


Auto deployment of configuration on yet-to-be-
discovered servers or chassis
Existing configuration templates in the OpenManage Enterprise can be assigned to the servers and chassis which are awaiting discovery.
These configuration templates are automatically deployed on the respective devices when they are discovered and onboarded.
To access the Auto Deploy page, click OpenManage Enterprise > Configuration > Auto Deploy.
The auto deploy targets and their respective Identifier (service tag or node IDs), template name, template type, status, and Boot to
Network ISO status (for servers) are displayed.
The Auto Deploy target list can be customized using the Advanced Filters fields available on the top of the list.
Section on the right side of the Auto Deploy page shows the Created On and Created By details of the selected auto deployment target.
When multiple items are selected, details of the last selected item is displayed in the section.
The following actions can be performed on the Auto Deploy page:
• Create templates for auto deployment. See Create auto deployment targets on page 66
• Delete templates that are not needed. SeeDelete auto deployment targets on page 67
• Export the auto deployment templates to different formats. See Export auto deployment target details to different formats on page
67
Create auto deployment targets
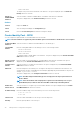
NOTE:
To perform any tasks on OpenManage Enterprise, you must have necessary user privileges. See Role-based
OpenManage Enterprise user privileges on page 14
To create auto deployment targets :
1. Click OpenManage Enterprise > Configuration > Auto Deploy > Create
The Auto Deploy Template wizard is displayed.
2. On the Template Information page, select the template type (Server or Chassis).
3. From the Select Template drop-down menu, select an appropriate template. If the selected template has identity attributes which
are not associated with any virtual identity pool, the following message is displayed: The selected template has identity attributes, but
it has not been associated with a virtual identity pool. Deploying this template will not change virtual network addresses on the target
devices.
4. Click Next.
The Target Information page is displayed.
5. On the Target Information page, target devices can be selected in one of the following methods:
• Enter Manually : Enter the Service Tag or node IDs to identify the target devices. The identifiers can be entered in any order,
however, identifiers must be comma separated. Click Validate to verify the accuracy of the values. It is mandatory to validate the
identifiers.
• Import CSV: Click Import CSV to browse the folders and select the respective .csv file with the target device details. A summary
of the number of successfully imported and invalid entries is displayed. For a more detailed view of the import result, click View
details.
The entries in the CSV file must have the following format: The identifiers must be listed in the first column, one per row, starting
from the second row. For a template CSV file, click Download sample CSV file.
6. Click Next.
7. On the Target Group information page, specify a subgroup under the Static group if available. For more information about
grouping of devices, see Organize devices into groups on page 35. The target devices would be placed under the specified target
group on their discovery
8. Click Next.
9. If the target device is a server, on the Boot to Network ISO page :
• Select the Boot to Network ISO check box.
• Select CIFS or NFS.
• Enter the ISO Path of location where the ISO image file is stored.
• Enter Share IP Address, Workgroup, Username, and password.
• Select the Time to Attach ISO dropdown menu options to set the number of hours the network ISO file will remain mapped to
the target device(s). By default, this value is set as four hours.
66
Manage device configuration templates