
Users Guide


3. Enter the local path information where the downloaded files are saved, and then click Check Now. Example paths: nfs://<IP
Address>/<Folder_Name>, http://<IP Address>/<Folder_Name>, https://<IP Address>/<Folder_Name>.
The available update version with a brief description of the new features are displayed.
4. To validate a connection to the catalog click Test now. If the connection to the catalog is established, a Connection
Successful message is displayed. If connection to the share address or the catalog file path is not established, Connection to
path failed error message is displayed. This step is an optional.
5. Click Update, and perform an update (applicable for future upgrades).
NOTE:
● Clicking Update initiates an Upgrade Bundle Download job. This job finishes by itself after all the update files are
downloaded and cannot be terminated by the user
● If the upgrade download has a problem connecting through proxy, uncheck the proxy settings and then download.
Log in after the update and confirm that the product works as expected. Check the audit log for any warnings or errors that are
related to the update. If any errors, export the audit log and save for tech support.
After the appliance is updated:
● Clear the browser cache. Not clearing the browser cache, may cause failing of new tasks post update.
● If upgrading from OpenManage Enterprise version 3.1, it is recommended that you re-configure or import the Active
Directory groups for enhanced performance.
● You can login immediately after the appliance is updated and don't have to wait till the entire inventory is discovered. Post
update, the discovery task will run in the background and you can see the progress occasionally.
Related tasks
Check and update the version of the OpenManage Enterprise and the available plugins on page 144
Install a plugin
Install a plugin based on your requirement to enhance the functionality of OpenManage Enterprise.
● Ensure that the connectivity to repository is successful.
○ For online, download.dell.com portal.
○ For offline, server is configured with the required plugin catalog and plugin installation files.
NOTE: Installing a plugin on OpenManage Enterprise restarts the appliance services.
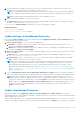
To install a plugin perform the following steps:
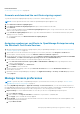
1. Click Application Settings > Console and plugins
The Console and plugins page is displayed
2. In plugins section, against the plugin you want to install, click More Actions > Install
The Install plugin window is displayed.
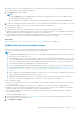
3. Review and ensure that you meet the list of prerequisites that are mentioned under the Prerequisite section.
NOTE: The lists of prerequisites change as you select the version of plugin that you want to install.
4. In Install Details, select the required version of the plugin from the Version(s) drop-down menu, and then click Install
plugin.
The details of the number of users logged in to OpenManage Enterprise, tasks in progress, and schedule jobs are displayed in
the confirmation window.
To confirm the installation, select I agree that I have captured the snapshot of the OpenManage Enterprise appliance
prior to the upgrade option, and then click Confirm Install.
The status of installation is displayed.
Disable a plugin
Disables all the functionality of the plugin on OpenManage Enterprise.
NOTE: Disabling a plugin on OpenManage Enterprise restarts the appliance services.
148 Managing OpenManage Enterprise appliance settings