
Users Guide


Add an OpenID Connect provider to OpenManage Enterprise
Adding, enabling, and registering an OpenID Connect provider (Keycloak or PingFederate) allows for an authorized client login to
OpenManage Enterprise. This generates a Client ID.
To add an OpenID Connect provider to OpenManage Enterprise, go to the Application Settings > Users > OpenID Connect
Providers page and do the following:
NOTE: Only a maximum of four OpenID Connect provider clients can be added.
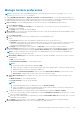
1. Click Add to activate the Add New OpenID Connect Provider page.
2. Fill the following information in the respective fields:
a. Name - Name for the OIDC client.
b. Discovery URI - Uniform Resource Identifier of the OIDC provider
c. Authentication type - Choose from one of the following methods the access token must use to access the appliance:
i. Initial Access Token - Provide the Initial access token
ii. Username and Password - Provide the username and password
d. (Optional) Certificate Validation check box - You can select the check box and upload the OIDC provider's certificate by
clicking Browse and locating the certificate or by dragging and dropping the certificate in the 'broken line' box.
e. (Optional) Test connection - Click Test URI and SSL Connection to test the connection with the OpenID Connect
provider.
NOTE: Test connection does not depend on the username and password or the initial access token details, as it only
checks for the validity of the Discovery URI provided.
f. (Optional) Enabled check box - You can select the check box to allow the authorized client access tokens to login to the
appliance.
3. Click Finish.
The newly added OpenID Connect provider is listed on the Application Settings > Users > OpenID Connect providers page and
the Client ID can be located on the right pane.
Next steps:
Configure an OpenID Connect provider policy in PingFederate for role-based access to OpenManage Enterprise on page 141
Configure an OpenID Connect provider policy in Keycloak for role-based access to OpenManage Enterprise on page 142
Configure an OpenID Connect provider policy in PingFederate for
role-based access to OpenManage Enterprise
To enable OpenManage Enterprise OpenID Connect login using PingFederate, you must add and map a scope dxcua (Dell
extended claim for user authentication) to the Client ID and define the user privileges as follows:
NOTE: The default assigning algorithm should be RS256 (RSA Signature with SHA-256).
1. Add an 'exclusive' or 'default' scope called dxcua under Scope Management in OAuth Settings.
2. Map the scope created in OpenID Connect Policy Managment > Policy using the following steps:
a. Enable Include User info in Token
b. In the Attribute Scope, add the scope and attribute value as dxcua.
c. In Contract fulfillment, add dxcua and select the type as 'Text'. Then, define the user privileges for OpenManage
Enterprise OpenID Connect provider login using one of the following attributes:
i. Administrator: dxcua : [{“Role": "AD"}]
ii. Device Manager: dxcua : [{“Role": "DM"}]
iii. Viewer: dxcua : [{“Role": "VE"}]
d. If an 'exclusive' scope is configured after the client registration in OpenManage Enterprise, edit the configured client in
PingFederate and enable the created 'dxcua' exclusive scope.
3. Dynamic client registration should be enabled in PingFederate for OpenManage Enterprise client registration. If the
'Require Initial access token' option is unselected in OpenID Connect provider client settings, the registration will work with
Username and password. If the option is enabled, then the registration will work only with the Initial Access token.
Managing OpenManage Enterprise appliance settings
141