
Users Guide


122 Configuring the DRAC 5 Using the Web User Interface
Configuring Smart Card
NOTE: To modify these settings, you must have Configure DRAC 5 permission.
NOTE: For more information about the Smart Card, see the white paper on the Dell
website at www.dell.com/openmanage.
1
Expand the
System
tree and click
Remote Access
.
2
Click the
Configuration
tab and then click
Smart Card
.
3
Configure the Smart Card logon settings.
Table 4-45 provides information about the
Smart Card
page settings.
4
Click
Apply Changes
.
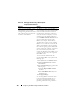
Table 4-45. Smart Card Settings
Setting Description
Configure Smart Card
Logon
• Disabled — Disables Smart Card logon. Subsequent
logins from the graphical user interface (GUI) display
the regular login page. All command line out-of-band
interfaces including secure shell (SSH), Telnet,
Serial, and remote RACADM are set to their default
state.
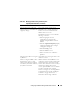
• Enabled — Enables Smart Card logon. After applying
the changes, logout, insert your Smart Card and then
click
Login
to enter your Smart Card PIN. Enabling
Smart Card logon disables all CLI out-of-band
interfaces including SSH, Telnet, Serial, remote
RACADM, and IPMI over LAN.
• Enabled with Remote Racadm — Enables Smart
Card logon along with remote RACADM. All other
CLI out-of-band interfaces are disabled.
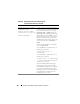
NOTE: The Smart Card logon requires you to configure
the local DRAC 5 users with the appropriate certificates.
If the Smart Card logon is used to log in a Microsoft
Active Directory user, then you must ensure that you
configure the Active Directory user certificate for that
user. You can configure the user certificate in the Users→
User Main Menu page.