
Users Guide


Configuring the DRAC 5 Using the Web User Interface 103
Configuring Active Directory (Standard Schema and Extended Schema)
1
In the
Active Directory Main Menu
page, select
Configure Active
Directory
and click
Next
.
2
In the
Active Directory Configuration and Management
page, enter the
Active Directory settings.
Table 4-14 describes the
Active Directory Configuration and
Management
page settings.
3
Click
Apply
to save the settings.
4
Click the appropriate
Active Directory Configuration
page button to
continue. See Table 4-15.
5
To configure the Role Groups for Active Directory Standard Schema, click
on the individual Role Group (1-5). See Table 4-16 and Table 4-17.
NOTE: To save the settings on the Active Directory Configuration and
Management page, you have to click Apply before proceeding to the Custom
Role Group page.
Table 4-13. Active Directory Main Menu Page Buttons
Button Definition
Print Prints the contents of the open window to your default
printer
Next Go to the next selected Option page.
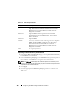
Table 4-14. Active Directory Configuration and Management Page Settings
Setting Description
Enable Active
Directory
Enables Active Directory. Checked=Enabled;
Unchecked=Disabled.
ROOT Domain Name The Active Directory ROOT domain name. This value is
NULL by default.
The name must be a valid domain name consisting of x.y,
where x is a 1-254 character ASCII string with no blank
spaces between characters, and y is a valid domain type
such as com, edu, gov, int, mil, net, org.