
Solution Guide


Analyze 83
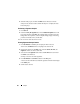
Create an Analysis Job
1
Click the
Analysis Jobs
tab in the main
Source Processor
dialog.
2
Click
New
. The
Create Analysis Job/Job Name
dialog displays.
The default job name is Job__[yyyy_mm_dd__hh_mm_ss], for example:
Job___2009_06_24__03_42_42_PM.
A job name cannot contain spaces at the beginning or end of the name, or any
of the following characters: \ / : * ? " < > |
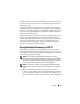
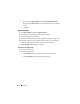
3
Enter a job name and click
Next
. The
Create Analysis Job/Module
Selection
dialog displays.
This dialog shows module folders in the left pane and single modules within
those folders in the right pane.
If a module is included in an analysis job, but there is no data for that module
when that job is run against a collection, that module is ignored. This feature
allows you to create generic analyses jobs for a variety of collected data sets.
4
Enter a check the module's check box.
You may select more than one module.
Analyses modules do not have user configurable settings.
To select all the modules in a group, enter a check beside that group's folder
name in the left pane.
5
Click
Finish
.
NOTE: Analyses jobs may list available modules not listed in collection jobs. These
modules are identified as legacy modules so you can analyze data that was
collected in previous versions of Source Processor using modules that no longer
exist.
Run an Analysis Job
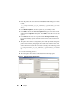
1
From the
Collected Data
tab, select the evidence that you want to analyze by
first selecting the job name in the left pane. Then, select the actual evidence
files in the table on the right.
2
Click
Run Analysis
. The
Select Analysis to Run
dialog opens.