
Deployment Guide
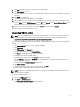


3. Click OK.
A message is displayed at the top of the screen indicating that the grid is in maintenance mode.
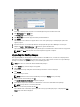
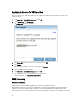
4. Click Grid Upgrade on the Admin page.
The Grid Upgrade window is displayed.
5. Click Choose File and select the upgrade file that you had downloaded.
6. Click Submit.
Follow the onscreen instructions to upgrade all the servers in the grid. A progress box displays the upload and
upgrade progress.
7. Refresh the browser screen if the login window is not displayed and log in to the vdiManager console again.
8. Navigate to Admin → Grid Maintenance → OK to take the grid out of maintenance.
Log in to the vdiManager console again to verify that the grid is not in maintenance mode and it has been upgraded.
NOTE: Click About at the top of the console to verify that the upgrade is complete.
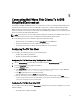
Upgrading the Existing Images
After upgrading VIAB, the existing images need to be updated. On the VIAB console, a caution icon is displayed on the
status of these images on the
Images page. Point your cursor over the caution icon to check for a message indicating if
the image is out of date. To upgrade the images, use the following procedure:
NOTE: Ensure the user account has domain administrator privileges.
1. On the Images page, select the image to be upgraded.
2. Click on Edit.
A confirmation message stating that a new draft image is about to be created is displayed.
3. Click Confirm.
A new draft image is started.
NOTE: Wait for the status of the new draft image to change to Running before proceeding.
4. In the row for the new draft image, click Edit.
The Specify Administrator Credentials dialog box is displayed.
5. Select whether to provide credentials for an administrator or a local user with administrator privileges.
NOTE: If using a local user account, disable UAC.
6. Type the user name and password and click OK.
The installation of the new Desktop Agent begins and a status page showing the progress is displayed. The Edit
Image page of the wizard is displayed.
22