
Deployment Guide

Creating A Windows Reference VM
After the vdiManager and grid are configured, the next step is to generate a base desktop image, or the first golden
image, based on an existing Windows reference VM, which can be imported, converted, or created new on your
hypervisor. Follow the steps to create a new Windows reference VM for your hypervisor.
While creating the Windows reference VM, ensure you meet the following requirements:
• The VM is installed with one of the following operating systems:
– Windows XP Professional edition (32-bit )
– Windows 7 Professional or Enterprise editions (32-bit or 64-bit)
• The local administrator account is enabled on the VM.
• Remote connections is enabled for your users.
• The Remote Desktop Connection (RDP) functionality is enabled.
• The VM has only one network interface card (NIC) and is assigned to Device 0.
• The VM has only one disk image.
• The VM is powered on and operational before you add it to the VDI-in-a-Box grid.
• The VM does not have any snapshots.
• At least 4 GB of space is available on the system.
• The VM is activated using a valid Microsoft Volume Activation key.
• The hypervisor client tools are installed on the VM. For example, if your hypervisor is XenServer, then the
XenServer tools must be installed on the VM.
• Enable File and Printer Sharing in the firewall settings of the VM to allow remote desktop connections for all
networks.
• If required, add the VM to a domain.
NOTE: The VM can be a member of a workgroup.
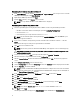
Creating A Windows Reference VM Using Citrix XenServer
1. Use the IP address noted during the procedure Configuring Your Hypervisor to connect to your Citrix XenServer
using the XenCenter client.
2. Right-click on your server and select New VM. Alternatively, you can click VM on the top menu and select New
VM.
3. Select the appropriate Windows operating system template and proceed with creating the VM.
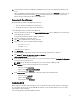
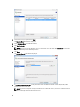
Creating A Windows Reference VM Using Microsoft Hyper-V
1. In the Server Manager console, navigate to Roles and Hyper-V→ Hyper-V Manager and select your server.
2. Right-click the name of your server and select the option New→ Virtual Machine. Alternatively, select the Action
tab and select New→ Virtual Machine.
3. Use the wizard to complete the VM setup.
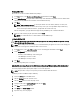
Creating A Windows Reference VM Using VMware ESXi
1. Connect to your ESXi hypervisor via vSphere Client.
2. In the Inventory view, right-click your server and select New Virtual Machine.
3. Use the wizard to complete the VM setup.
15