
Deployment Guide

Determining The IP Address Using Microsoft Hyper-V
1. In the Server Manager console, expand Roles and Hyper-V→ Hyper-V Manager and select your server so that the
vdiManager VM is displayed under Virtual Machines.
2. Right-click the vdiManager VM and select Start.
3. From the Action tab menu, select Console to access the VM.
NOTE: A message with the IP address for the VIAB console is displayed.
Determining The IP Address Using VMware ESXi
1. Connect to your ESXi hypervisor using vSphere Client or VMware vCenter using the following credentials:
a. IP address: Enter the IP address noted during the procedure Configuring Your Hypervisor.
b. User name: Enter root.
c. Password: Enter your root password. The default is dvssim11.
NOTE: You can install the vSphere client by browsing to http://<IP ADDRESS>, where IP ADDRESS is your
vSphere hypervisor IP address.
2. If you receive a certificate security warning, select the checkbox next to “Install this certificate…” and click
Ignore.
An evaluation notice appears until you enter your ESXi license information.
3. Click OK bypass the evaluation for now.
NOTE: You must enter your license information within 60 days or the appliance ceases to function properly.
CAUTION: Do not install a free license key as the APIs required for VIAB to work with the hypervisor close
and the setup process ends.
4. To enter your license key, click View on the top menu and navigate to Inventory→ Inventory.
5. Click on the IP address of your ESXi host and select the Configuration tab.
6. Click the Licensed Features link under the Software table and then click the Edit... link near the top right of the
screen.
7. Choose Assign a new license… and enter the license key.
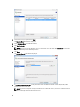
8. Under the Configuration tab, click on the Networking link under the Hardware column to display the virtual switch.
9. Click the Properties... link next to vSwitch0.
NOTE: By default, the VM Network and Management Network are configured to use the same virtual switch
and physical network adapter. It is recommended that the VM Network be configured to use vmnic0 (Gb1 in
the Physical Network Connections diagram).
10. In the vSwitch0 Properties window, select VM Network under the Ports tab and click on Remove.
11. Click Yes to confirm.
12. Click Close on the vSwitch0 Properties window.
13. Click the Add Networking… link next to vSwitch0.
14. In the Add Network Wizard window, select Virtual Machine as the connection type and click Next.
15. Select vmnic0 as the virtual switch and click Next.
NOTE: Ensure that the Network Label field is VM Network and the VLAN ID is set to None.
16. Click Next and then Finish.
The Management Network now appears on vSwitch0/vmnic2 and the VM Network on vSwitch1/vmnic0.
12