
User's Manual


Table Of Contents
- Contents
- About Your System
- Using the System Setup Program
- Installing System Components
- Recommended Tools
- Inside the System
- Opening and Closing the System
- Cooling Shroud
- System Battery
- Optical Drive
- Configuring the Boot Drive
- Hard Drives
- Installing a SAS Controller Card
- Fan Assembly
- Optional PCI Fan Assembly
- Power Supply
- Expansion Cards
- Riser Card
- System Memory
- Processor
- Control Panel Assembly (Service-Only Procedure)
- System Board (Service-Only Procedure)
- Troubleshooting Your System
- Safety First-For You and Your System
- Start-Up Routine
- Checking the Equipment
- Responding to a Systems Management Software Alert Message
- Troubleshooting a Wet System
- Troubleshooting a Damaged System
- Troubleshooting the System Battery
- Troubleshooting the Power Supply
- Troubleshooting System Cooling Problems
- Troubleshooting System Memory
- Troubleshooting an Optical Drive
- Troubleshooting a Hard Drive
- Troubleshooting Expansion Cards
- Troubleshooting the Microprocessor
- Running the System Diagnostics
- Jumpers and Connectors
- Getting Help
- Glossary
- Index
72 Installing System Components
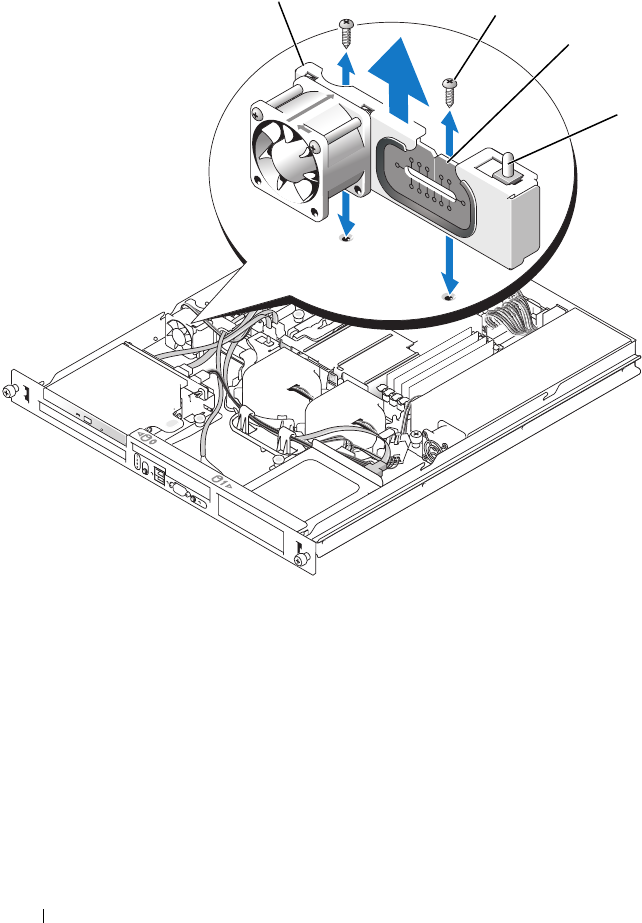
Figure 3-12. Installing and Removing the PCI Fan Assembly
Installing the PCI Fan Assembly
1
Align the fan assembly with the screw holes on the chassis and use a #2
Phillips screwdriver to install the two mounting screws. See Figure 3-12.
2
Connect the fan’s power cable to the PCI FAN connector on the system
board. See Figure 6-2 for the location of the connector.
1 PCI fan assembly 2 screws (2) 3 panel cutout
4 chassis intrusion switch
1
2
4
3
book.book Page 72 Thursday, August 30, 2007 3:30 PM