
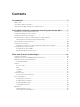
Setup Guide


2
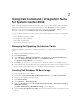
Using Dell Command | Integration Suite
for System Center 2012
Before you begin using Dell Command | Integration Suite for System Center 2012 , make sure that the
target Dell client systems are auto-discovered and present under All Systems on the Configuration
Manager console. For more information on auto-discover through Configuration Manager, see the
Microsoft TechNet article at technet.microsoft.com/en-us/library/gg682144.
You can use Dell Command | Integration Suite for System Center 2012 to perform the following tasks:
• Create Dell Windows PE boot image
• Create Dell client driver packages
• Import Dell client packages
• Create a bare-metal task sequence
Managing And Updating Distribution Points
Update the distribution points before creating a task sequence. To update and manage distribution
points:
1. Launch the Configuration Manager console.
2. Click Software Library.
3. Expand Overview → Application Management. → Packages and click Dell Client Deployment.
4. Right-click Client Custom Reboot Script and click Distribute Content.
The Distribute Content Wizard screen is displayed.
5. Click Next and follow the on-screen instructions to distribute content to the distribution points.
6. If the packages were not distribute while they were being created, repeat step 3 and step 4 to ensure
that the client system is able to access the packages during an operating system installation.
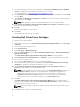
Creating Dell Windows PE Boot Image
To create a Dell Windows PE boot image:
1. Download the Dell Command | Deploy (WinPE) Driver Library file from dell.com/downloads.
2. Launch the Configuration Manager console.
3. Click Software Library.
4. Expand Overview → Operating Systems.
5. Right-click Boot Images and click Dell Command | Integration Suite → Dell Command | Deploy
(WinPE) Driver Library.
The Dell Command | Deploy (WinPE) Driver Library screen is displayed.
6. Under the Select boot image(s) to modify select the boot images into which you want to insert the
drivers.
7