Dell Command | Configure Version 4.2 User's Guide April 2019 Rev.
Notes, cautions, and warnings NOTE: A NOTE indicates important information that helps you make better use of your product. CAUTION: A CAUTION indicates either potential damage to hardware or loss of data and tells you how to avoid the problem. WARNING: A WARNING indicates a potential for property damage, personal injury, or death. © 2018 - 2019 Dell Inc. or its subsidiaries. All rights reserved. Dell, EMC, and other trademarks are trademarks of Dell Inc. or its subsidiaries.
Contents Chapter 1: Introduction to Dell Command | Configure 4.2.............................................................. 5 What’s new in this release.................................................................................................................................................5 Other documents you may need......................................................................................................................................
Chapter 4: Troubleshooting scenarios in Dell Command | Configure 4.2....................................... 21 Contacting Dell...................................................................................................................................................................22 Chapter 5: Third-party licenses...................................................................................................
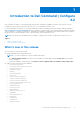
1 Introduction to Dell Command | Configure 4.2 Dell Command | Configure is a software package that provides configuration capability to business client systems. You can configure the client systems using a User Interface (UI) or a Command Line Interface (CLI). For more information on using the CLI, see Dell Command | Configure Command Line Interface Reference Guide available at Dell.com/DellClientCommandSuiteManuals.
○ ○ ○ ○ ○ ○ ○ ○ ○ ○ ○ --ExpansionBay2 --ExpansionBay3 --DynBacklightCtrl --NumlockLed --GraphicSpecMode --Thunderbolt --VmdPcieSlot --FanSpdAutoLvlonCpuMemZone --FanSpdAutoLvlonPcieZone --FanSpdAutoLvlonUpperPcieZone --FanSpdAutoLvlonFlexBayZone Other documents you may need In addition to this guide, you can access the following guides available at dell.com/dellclientcommandsuitemanuals.
2 Windows SMM Security Mitigations Table (WSMT) Compliance for Dell Command | Configure 4.2 The Windows (SMM) Security Mitigations Table contains information about the ACPI table that was created for the Windows operating system, which supports Windows virtualization-based security (VBS) features. Dell Command | Configure is WSMT compatible. This is used for configuring the platform features on Dell Client Systems with WSMT enabled BIOS.
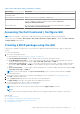
3 Using graphical user interface for Dell Command | Configure 4.2 Dell Command | Configure Graphical User Interface (Dell Command | Configure GUI) displays all BIOS configurations that are supported by Dell Command | Configure . Using the Dell Command | Configure GUI, you can do the following: ● Create BIOS configuration for client systems. For more information, see Creating a BIOS Package using GUI. ● Validate the BIOS configuration against the BIOS configuration of the host system.
Table 1. Files and folders of Dell Command | Configure Files/Folders Description Dell Command | Configure Command Prompt Allows access to the Dell Command | Configure command prompt. Dell Command | Configure Wizard Allows access to the Dell Command | Configure GUI. Dell Command | Configure WINPE Allows access to the Windows PE scripts to create a bootable image. For more details, see the Dell Command | Configure Installation Guide available at dell.com/ dellclientcommandsuitemanuals .
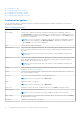
● ● ● ● ● Configuring Configuring Configuring Configuring Configuring boot order primary battery charging advanced battery charging peak shift battery charging keyboard backlight color option Configuration options You can customize the BIOS settings and create a configuration package using the available configuration options that are described in the following table: Table 2.
Table 2. Configuration options (continued) Options Description Command Line Options Displays the command line representation of the options. NOTE: You can view this option only in Advance View. Status Displays the status of the options of the loaded configuration. NOTE: The Status column is displayed only when you validate.
Configuring the autoon option You can configure the days on which you want the system to automatically turn on using the autoon option from the Power and Performance Management category. To configure the days: 1. Click the required option: ● Create Multiplatform Package ● Create Local System Package ● Open a Saved Package NOTE: To open a saved package, click Open a Saved Package, browse to the file location, and then click Open. 2. Click Edit, or double-click the option. 3.
Boot order screen The following table displays the available options on the Dell Command | Configure - Boot Order screen. Table 3. Options on the boot order screen Options Description Active Boot List You can configure or modify the Active Boot List for UEFI or Legacy based on the requirement. If the active boot list is ON, and then the system boots with UEFI or Legacy based on the boot order type. NOTE: In Local System Package, you cannot modify Active Boot List if the system supports only UEFI.
Configuring the primarybatterycfg option You can configure the primary battery charging mode using the primarybatterycfg option from the Power and Performance Management category. To configure the primary battery charging option: 1. Click the required option: ● Create Multiplatform Package ● Create Local System Package ● Open a Saved Package NOTE: To open a saved package click Open a Saved Package, browse to the file location and then click Open. 2. Click Edit, or double-click the option. 3.
8. Click OK. 9. To apply the modifications, export the configuration in ,ini or .exe format. See, Exporting the BIOS configuration. Configuring the peakshiftcfg option You can configure the Peak Shift battery charging mode using the peakshiftcfg option from the Power and Performance Management category. Using Peak Shift configuration, you can minimize the consumption of AC power during the peak power usage period of the day. You can set a start and end time for the Peak Shift period.
2. Click Edit or double-click the option. 3. In the keyboardbacklightcolor option row, click View/Change in the Value to set column. The Keyboard Backlight Color screen is displayed. 4. Select the colors that you want to enable for the keyboard backlight from the list Enable. NOTE: ● You can select and enable multiple colors at a time. ● If you select None, no color will be enabled. You cannot select other colors if you have selected the option None. 5.
5. To set the non-critical threshold value for the listed probes, provide the value in the respective column. 6. To delete a probe, click X mark. 7. Click OK. 8. To apply the modifications, export the configuration in ,ini or .exe format. See, Exporting the BIOS configuration. BIOS option validation You can validate the options of a BIOS package against the configuration of the host system using the Validate option.
1. Click the EXPORT.EXE option to export the BIOS configuration as an .exe file. 2. The Setup, System or Hard Disk Drive Password screen is displayed prompting you to type a password. 3. Depending on the type of password set on the target system, determine which password to provide based on the table below: Figure 1. Password Reference Table For example, 4. 5. 6. 7. ● If the setup password is set in the system, and you want to configure BIOS tokens/features, you need to provide setup password.
Applying INI or CCTK file The prerequisites for applying INI file or CCTK file are as follows: ● Administrator privileges ● Dell Command | Configure installed on the client system To apply INI file or CCTK file, run cctk -i . NOTE: For systems running Ubuntu Core operating system, copy the file at var/snap/dcc/current and run, dcc.cctk i /var/snap/dcc/current/.ini Applying a shell script on Linux 1. Copy the script to a system running the Linux operation system. 2.
● Exporting the BIOS configuration ● Exporting the configuration without setting values Log details in Package History You can view the details of the BIOS configuration exports in the Package History screen. The Package History displays the details such as time, date, type of export, and the location to which the file is exported. Related Links: ● Viewing a log file ● Deleting log details Viewing a log file Click Package History, on the Dell Command | Configure page.
4 Troubleshooting scenarios in Dell Command | Configure 4.2 Running Dell Command | Configure displays error messages If you get the error message, Required BIOS interface not found or HAPI load error. and then uninstall and reinstall Hardware Application Programming Interface (HAPI). Running Dell Command | Configure on 32-bit and 64-bit Windows supported system Ensure that you are running cctk.exe based on the architecture of the system.
1. If not set, set the BIOS password on the system. Type: cctk --setuppwd= 2. If not enabled, enable TPM. by typing the following command: cctk --tpm=on 3. Reboot the system. 4. To activate TPM, type the following command: cctk --tpmactivation=activate --valsetuppwd= 5. Reboot the system without interruption till the operating system loads. 6. To check the status of TPM. type: cctk --tpmactivation The status is displayed as activate.
4. Select the appropriate service or support link based on your need. Troubleshooting scenarios in Dell Command | Configure 4.
5 Third-party licenses The table provides the details about third-party licenses. Table 4. Third-party licenses Sl No Component name Version License type 1 mini-XML(mxml1 library) 2.6 GNU Library General Public License version 2 (LGPL2) 2 miniunz.exe no version zlib license 3 zlibwapi.dll 1.2.3 zlib license 4 zip.exe no version zlib license 5 PiePiece.cs 0 Copyright (c) 2014 AlphaSierraPapa for the SharpDevelop Team 6 getoptl.c 1.15 Copyright (c) 2000 The NetBSD Foundation, Inc.
Public Licenses are intended to guarantee your freedom to share and change free software--to make sure the software is free for all its users. This license, the Library General Public License, applies to some specially designated Free Software Foundation software, and to any other libraries whose authors decide to use it. You can use it for your libraries, too. When we speak of free software, we are referring to freedom, not price.
application does not supply it, the square root function must still compute square roots.) These requirements apply to the modified work as a whole. If identifiable sections of that work are not derived from the Library, and can be reasonably considered independent and separate works in themselves, then this License, and its terms, do not apply to those sections when you distribute them as separate works.
terminated so long as such parties remain in full compliance. 9. You are not required to accept this License, since you have not signed it. However, nothing else grants you permission to modify or distribute the Library or its derivative works. These actions are prohibited by law if you do not accept this License.
Miniunz Copyright (c) <''year''> <''copyright holders''> This software is provided 'as-is', without any express or impliedwarranty. In no event will the authors be held liable for any damagesarising from the use of this software.Permission is granted to anyone to use this software for any purpose,including commercial applications, and to alter it and redistribute itfreely, subject to the following restrictions: 1.
other materials provided with the distribution. * 3. All advertising materials mentioning features or use of this software * must display the following acknowledgement: * This product includes software developed by the NetBSD * Foundation, Inc. and its contributors. * 4. Neither the name of The NetBSD Foundation nor the names of its * contributors may be used to endorse or promote products derived * from this software without specific prior written permission.