
Install Guide

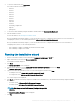
Table Of Contents
- Dell Command | Configure Version 4.1.0 Installation Guide
- Introduction
- Installing Dell Command | Configure on systems running Microsoft Windows
- Installing Dell Command | Configure on systems running Linux
- Installing Dell Command | Configure on systems running Red Hat Enterprise Linux 7
- Installing Dell Command | Configure on systems running Red Hat Enterprise Linux 6
- Installing Dell Command | Configure on systems running Ubuntu Desktop
- Installing Dell Command | Configure on systems running Ubuntu Core 16
- Uninstalling Dell Command | Configure on systems running Microsoft Windows
- Uninstalling Dell Command | Configure on systems running Linux
- Uninstalling Dell Command | Configure on systems running Red Hat Enterprise Linux 7
- Uninstalling Dell Command | Configure on systems Running Red Hat Enterprise Linux 6
- Uninstalling Dell Command | Configure on systems running Ubuntu Desktop
- Uninstalling Dell Command | Configure on systems running Ubuntu Core 16
- Upgrading Dell Command | Configure on systems running Microsoft Windows
- Upgrading Dell Command | Configure on systems running Linux
- Dell Command | Configure for Microsoft Windows PE
- Creating a bootable image preinstallation environment using Microsoft Windows PE 4.0, 5.0, and 10.0
- Integrating the Dell Command | Configure directory structure into an ISO file using Microsoft Windows PE 10.0
- Integrating the Dell Command | Configure directory structure into an ISO file using Microsoft Windows PE 5.0
- Integrating the Dell Command | Configure directory structure into an ISO file using Microsoft Windows PE 4.0
- Creating a bootable image preinstallation environment using Microsoft Windows PE 2.0 and 3.0
- Creating a bootable image preinstallation environment using Microsoft Windows PE 4.0, 5.0, and 10.0
- Reference

4 To view the extracted les, click View Folder.
The folder contains the following les:
• 1028.mst
• 1031.mst
• 1034.mst
• 1036.mst
• 1040.mst
• 1041.mst
• 1043.mst
• 2052.mst
• 3076.mst
• Command_Congure.msi
• mup.xml
• package.xml
5 To access the Dell Command | Congure installation wizard, double-click Command_Congure.msi.
6 Run the installation wizard.
For more information, see Running the installation wizard.
After you install Dell Command | Congure , you can use the GUI or the CLI to congure the client systems. For more information on
conguring the systems, see the following documents at dell.com/dellclientcommandsuitemanuals:
After you install Dell Command | Congure , you can use the GUI or the CLI to congure client systems. For more information on
conguring client systems, see the following documents:
• Dell Command | Congure Command Line Interface Reference Guide
• Dell Command | Congure User’s Guide
Running the installation wizard
1 Browse to the folder in which you have extracted the Command_Congure.msi or DUP le.
2 Right-click the MSI or DUP and click Run as administrator.
The installation wizard is displayed.
3 Click Next.
The License Agreement screen is displayed.
4 Read the license agreement and click I accept the terms in the licence agreement, and then click Next.
The Customer Information screen is displayed.
5 Type the user name and organization, select one of the following options, and then click Next.
• For multiple users select Anyone who uses this computer (all users).
• For a single user select Only for me (Dell Computer Corporation).
The custom setup screen is displayed.
6 Click Next to install Dell Command | Congure CLI and GUI in the default directory. The default Dell Command | Congure installation
directories are:
• For 32-bit system, C:\Program Files\Dell\Command Congure
• For 64-bit system, C:\Program Files (x86)\Dell\Command Congure
NOTE
: Click Change to install Dell Command | Congure in a specied
directory.
The Ready to Install the Program screen is displayed.
7 Click Yes.
Installing Dell Command |
Congure on systems running Microsoft Windows 9