
Install Guide
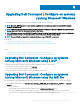
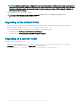
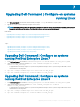
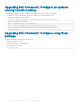
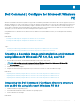
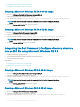
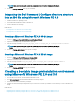
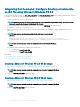
Table Of Contents
- Dell Command | Configure Version 4.1.0 Installation Guide
- Introduction
- Installing Dell Command | Configure on systems running Microsoft Windows
- Installing Dell Command | Configure on systems running Linux
- Installing Dell Command | Configure on systems running Red Hat Enterprise Linux 7
- Installing Dell Command | Configure on systems running Red Hat Enterprise Linux 6
- Installing Dell Command | Configure on systems running Ubuntu Desktop
- Installing Dell Command | Configure on systems running Ubuntu Core 16
- Uninstalling Dell Command | Configure on systems running Microsoft Windows
- Uninstalling Dell Command | Configure on systems running Linux
- Uninstalling Dell Command | Configure on systems running Red Hat Enterprise Linux 7
- Uninstalling Dell Command | Configure on systems Running Red Hat Enterprise Linux 6
- Uninstalling Dell Command | Configure on systems running Ubuntu Desktop
- Uninstalling Dell Command | Configure on systems running Ubuntu Core 16
- Upgrading Dell Command | Configure on systems running Microsoft Windows
- Upgrading Dell Command | Configure on systems running Linux
- Dell Command | Configure for Microsoft Windows PE
- Creating a bootable image preinstallation environment using Microsoft Windows PE 4.0, 5.0, and 10.0
- Integrating the Dell Command | Configure directory structure into an ISO file using Microsoft Windows PE 10.0
- Integrating the Dell Command | Configure directory structure into an ISO file using Microsoft Windows PE 5.0
- Integrating the Dell Command | Configure directory structure into an ISO file using Microsoft Windows PE 4.0
- Creating a bootable image preinstallation environment using Microsoft Windows PE 2.0 and 3.0
- Creating a bootable image preinstallation environment using Microsoft Windows PE 4.0, 5.0, and 10.0
- Reference

NOTE: Make sure that the path used in the command is that of the Dell Command | Congure
folder.
4 Browse to C:\winpe_x86\WIM and copy the ISO image.
Integrating the Dell Command | Congure directory structure
into an ISO le using Microsoft Windows PE 4.0
1 Install the Windows 8 operating system.
2 Download and install Windows ADK for Windows 8.
3 Create a Windows PE 4.0 image.
Related Links:
• Creating Microsoft Windows PE 4.0 64-bit image
• Creating Microsoft Windows PE 4.0 32-bit image
Creating a Microsoft Windows PE 4.0 64-bit image
1 Browse to C:\Program Files (x86)\Dell\Command Congure\X86_64.
2 Open the command prompt with administrator privileges.
3 Run the following command: cctk_x86_64_winpe_4.bat C:\winpe_x86_64 C:\Progra~2\Dell\Comman~1.
NOTE
: Make sure that the path used in the command is that of the Dell Command | Congure
folder.
4 Browse to C:\winpe_x86_64\wim and copy the ISO image.
Creating a Microsoft Windows PE 4.0 32-bit image
1 Browse to C:\Program Files\Dell\Command Congure\X86.
2 Open the command prompt with administrator privileges.
3 Run the following command: cctk_x86_winpe_4.bat C:\winpe_x86 C:\Progra~1\Dell\Comman~1.
NOTE
: Make sure that the path used in the command is that of the Dell Command | Congure
folder.
4 Browse to C:\winpe_x86\WIM and copy the ISO image.
Creating a bootable image preinstallation environment
using Microsoft Windows PE 2.0 and 3.0
1 From the Microsoft website, download and install Windows AIK.
2 From dell.com/support, download and install Dell Command | Congure .
3 Download and install Dell Command | Congure .
4 Integrate the Dell Command | Congure directory structure into an ISO le (for Windows PE 2.0 and 3.0) to create a bootable ISO
image.
Related Links:
• Integrating Dell Command | Congure directory structure to an ISO le using Microsoft Windows PE 3.0
• Integrating Dell Command | Congure directory structure in a WIM le using Microsoft Windows PE 2.0
Dell Command |
Congure for Microsoft Windows PE 23